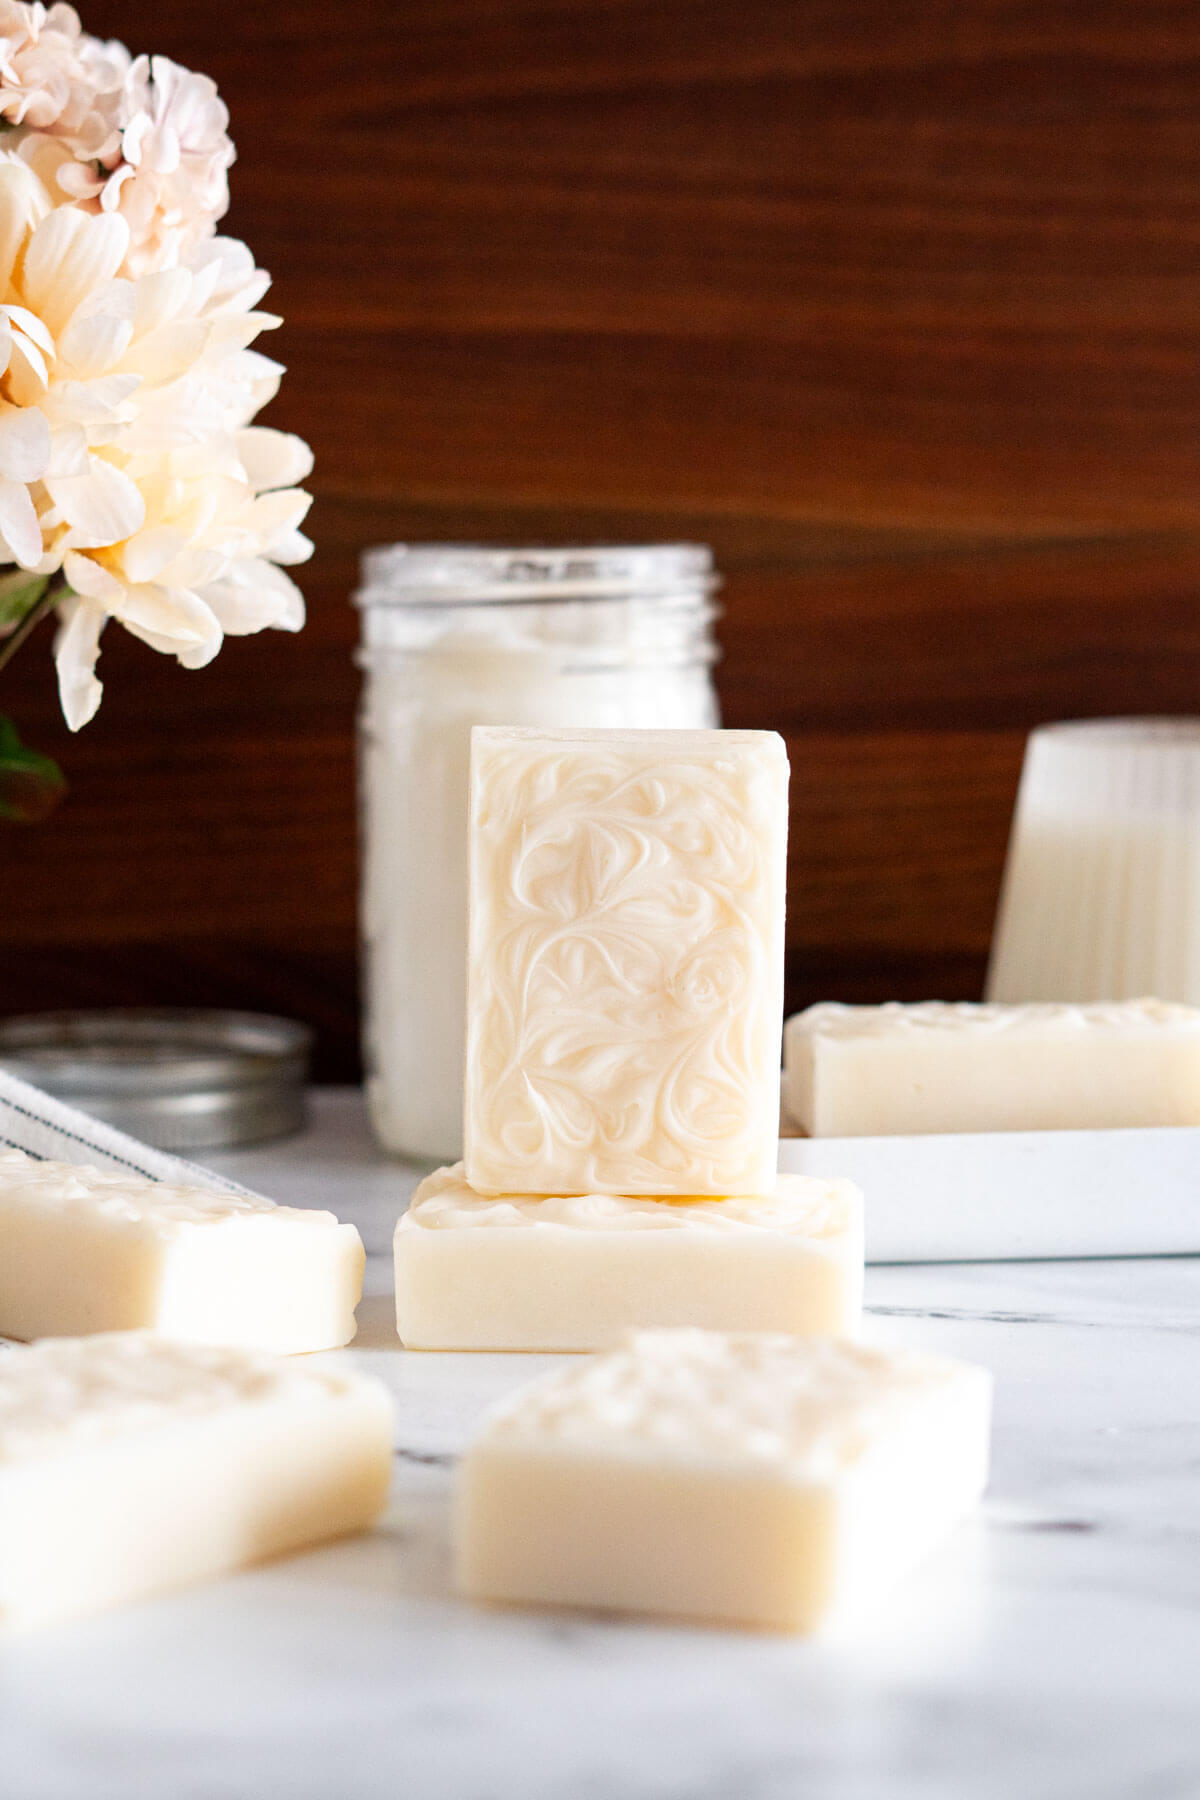
Tallow Soap
Let me introduce you to tallow soap—the soap you didn’t know you needed.
Once you experience these luxurious, old-fashioned bars, there’s no going back. Unlike mass-produced soaps, handcrafted tallow soap offers a rich, nourishing experience that leaves your skin feeling pampered and loved.
These aren’t your average bars of soap. From the first use, you’ll notice the difference—and so will your skin.
Oh and don't worry, if you're a beginner, I break down the entire process into step by step, bite sized chunks! If you're experienced with soap making, just click the recipe link in the table of contents!
Jump to:
Tallow Soap Benefits
There’s a reason tallow based soap has been around for ages. It’s a tried-and-true classic that I always come back to.
- Creamy lather: Tallow soap produces a rich, luxurious lather that feels so nourishing on the skin.
- Durability: These bars are firm and long-lasting, unlike some handmade soaps that melt away too quickly.
- Zero-waste: Using tallow is an amazing way to reduce waste. It’s made from animal fat, often a byproduct of butchery, so nothing goes to waste. For me, it’s about respecting the animal and honoring its sacrifice by using every part.
Where to Source Tallow
One of the first steps in making tallow soap is sourcing the tallow itself. If you’re lucky enough to have access to beef suet, you can render your own tallow at home—it’s simple, satisfying, and ensures you know exactly what’s going into your soap. I’ve written a complete guide to rendering tallow, so if you want to give it a try, be sure to check that out for step-by-step instructions.
We’re fortunate to have a friend with a grass fed beef operation, and they're able to provide us with high-quality beef suet. This is a fantastic option if you have connections to local farmers or ranchers who raise grass-fed cattle. The suet is often seen as a byproduct, so many farmers are happy to share or sell it for a low cost.
If you don’t have direct access to a local farmer, here are a few other options:
- Local Butchers: Many butchers will have beef suet available.
- Health Food Stores: Some stores carry pre-rendered tallow in jars, often labeled for cooking or skincare. This can be a convenient, though sometimes pricier, option.
- Online Retailers: You can find pre-rendered tallow online, often from specialty suppliers focused on natural or grass-fed products. This is a great alternative if local sourcing isn’t an option for you.
Cold Process Soap
I’m a big fan of cold process soap-making. Unlike hot process, which feels a bit rushed, cold process is slower and gives me time to enjoy the craft. Plus, it produces smooth, beautiful bars that feel luxurious on the skin.
The magic of soap-making lies in a process called saponification. This is the chemical reaction where the oils and fats in your formula mix with lye to create soap. With cold process, the soap cures over several weeks, allowing the reaction to complete fully and resulting in a gentle, skin-friendly bar. Sure, it requires a little patience, but I think it’s totally worth the wait.
Quick Overview Of The Steps:
- Mix the lye solution
- Weigh all of the oils and melt
- Add lye solution to oils and mix until trace
- Pour soap into molds and set 48 hours
- Remove soap from molds and cure
Safety First!
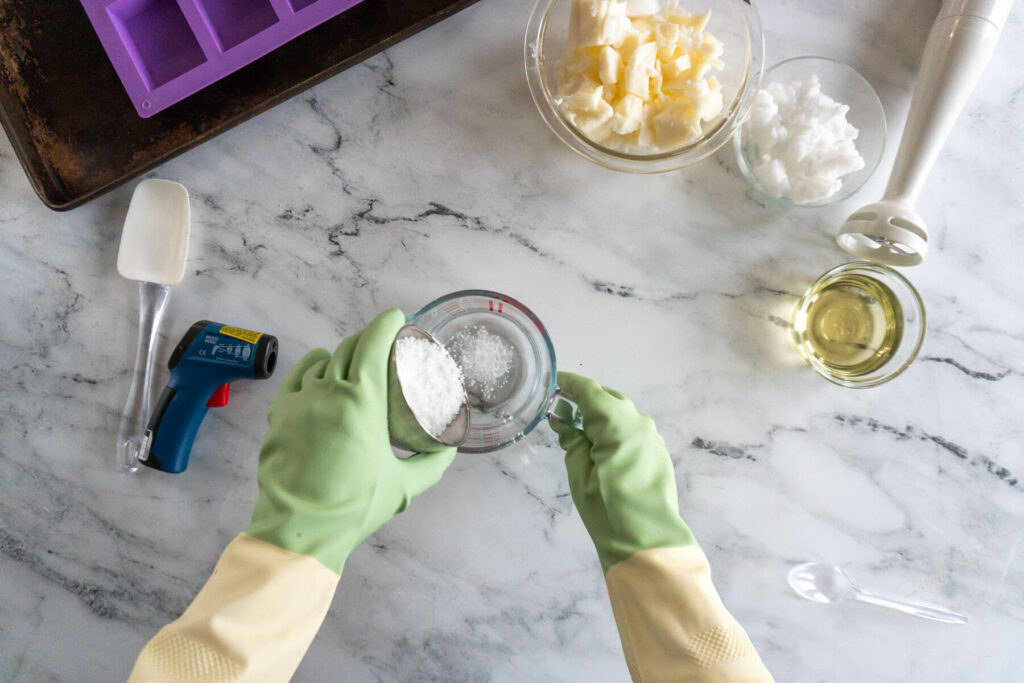
When it comes to soap-making, safety has to be your top priority. Lye is no joke—it’s incredibly alkaline and can burn your skin or eyes on contact. That’s why I always make sure to suit up with rubber gloves and safety glasses before I even open the container.
If you do happen to get lye crystals or lye water on your skin, flush the area immediately with cold water until the burning sensation is completely gone. Don’t wait—it’s not something you can “tough out.”
If you spill the lye solution on a surface, you should mop it up with paper towels before rinsing them with cold water until diluted and then toss. Rinse the area with clean water several times to ensure the lye is completely and safely diluted. Lye crystals can be swept up and disposed of.
Mixing lye requires care and attention. Remember this rule: always add the lye to your water, not the other way around. Adding water to lye can cause an exothermic (heat producing) reaction that’s strong enough to make it erupt from the container. Nobody wants a surprise lye volcano!
A few other safety tips I live by:
- Soap solo: I always wait until the house is calm—no kids or pets running around—before I start. Even my teens are banned from the kitchen when I’m working with lye!
- Dedicated tools: I keep a set of tools just for soap-making. It’s so much easier than worrying about whether my kitchen items are clean enough. Over the years, I’ve gathered my soaping gear from thrift stores and garage sales. My most expensive piece? A $15 glass bowl with a pour spout that makes pouring soap into molds a breeze. My best score? A $2 immersion blender!
Tips and Tricks
If you’re new to working with tallow soap, here are a few things I’ve learned along the way:
- Experimentation is key: Tallow works beautifully on its own, but it also plays well with others. I love combining it with oils like olive or coconut to customize the bar’s properties. While you can absolutely make soap with 100% tallow, I like to add a small amount of other oils to enhance cleansing and improve the lather. Coconut oil, for example, increases bubbles and sudsing, while sweet almond oil conditions the skin. That said, tallow alone makes a perfectly fine soap if you’re aiming for simplicity.
- Always Measure by Weight: Soap-making requires precision, so measuring by weight is non-negotiable. Different oils, fats, and liquids have varying densities, making volume measurements unreliable. Weighing your ingredients ensures accuracy, consistency across batches, and—most importantly—a safe final product with the correct lye-to-oil ratio.
- Run Recipes Through a Soap Calculator: Whether you’re using my recipe or crafting your own, always plug your measurements into a soap calculator like SoapCalc or BrambleBerry’s Lye Calculator before starting. These tools double-check your oil-to-lye ratios to ensure proper saponification and safe end products.
- Don’t Skip the Curing Time: Cold process soap needs time to mature. During curing, excess water evaporates, the bars harden, and the saponification process fully completes. This curing period—typically 4 to 6 weeks—ensures your soap is gentle on the skin and long-lasting. If you rush and use your soap too early, it won’t perform as well and may break down quickly under use. Trust me, the wait is worth it!
- Soft Soap? If your soap is slightly soft when un-molding, you can allow it to set for another 24 hours, or you can pop the mold in the freezer for a couple of hours then remove from the mold.
Recipe Notes
- Soaping temperatures: Tallow is forgiving when it comes to temperature. I usually soap at around 100°F, but tallow can handle up to 120°F. That little extra heat can make your process smoother.
- Slow trace: Tallow soaps tend to take their time reaching trace. If you’re used to quicker-moving recipes, don’t be surprised if this one takes a bit longer. If you’re in a hurry, soaping at a slightly higher temperature can help speed things up. This batch took about 10 minutes of mixing to reach trace.
- Additional oils: I like to add coconut oil to my tallow soap because when saponified it adds large fluffy bubbles, and sweet almond oil because it adds to the conditioning quality of the bars.
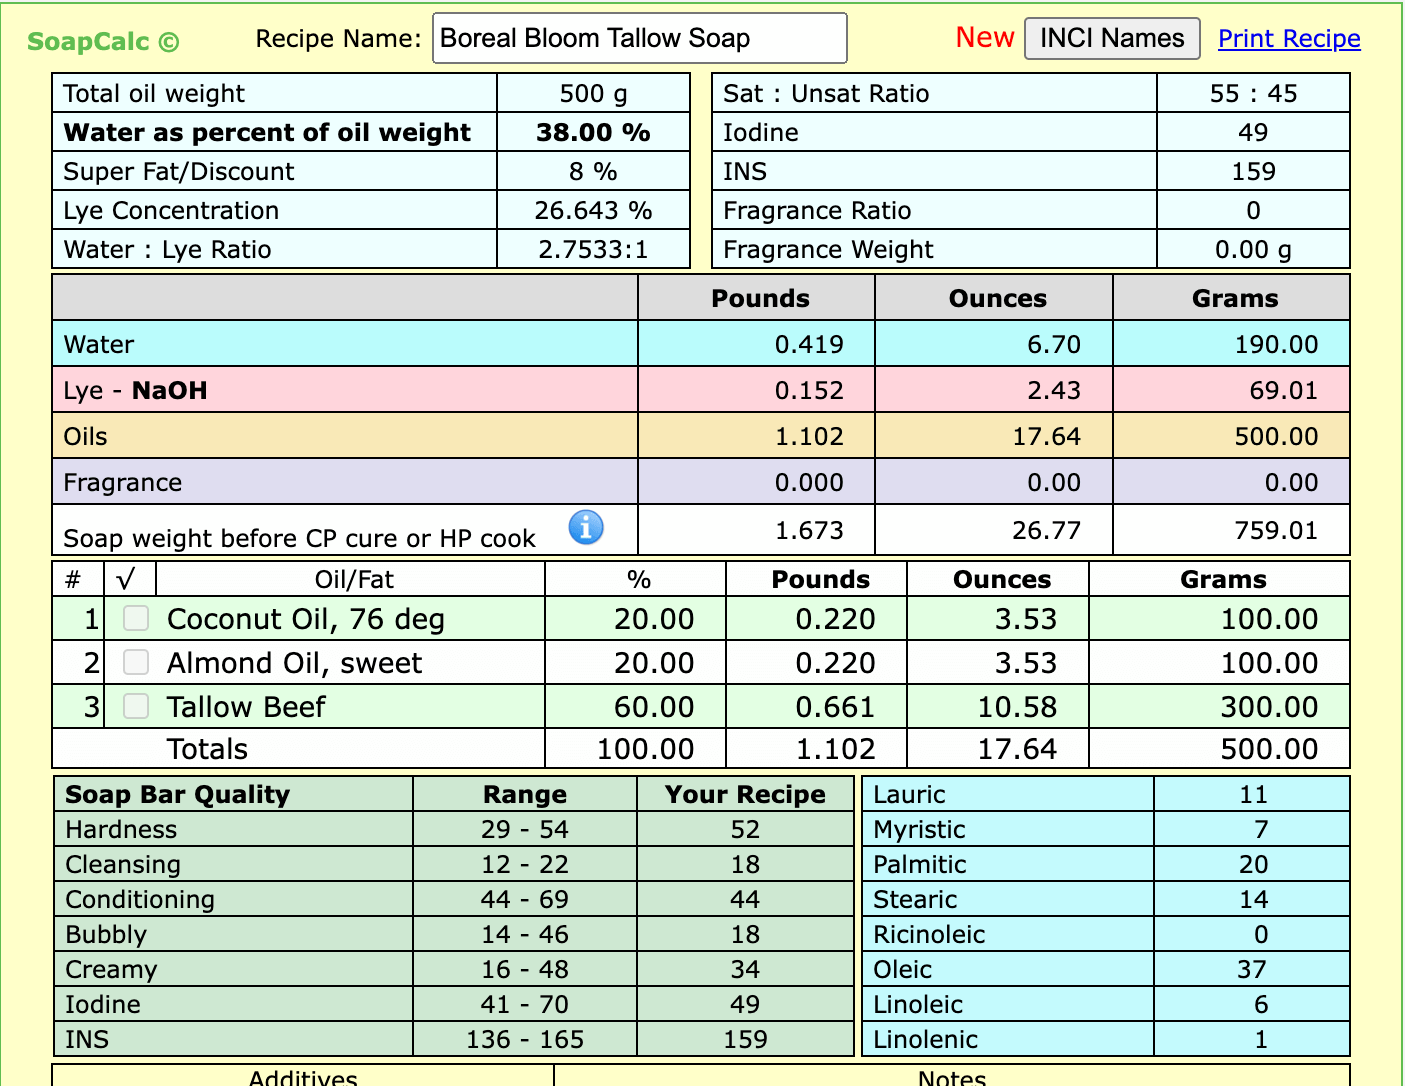
- 8% superfat: This means that 8% of the oils or fats in the recipe remain unsaponified, adding extra moisturizing and conditioning properties to the soap, making it gentler on the skin and better suited for everyday use, especially in dry or cold climates.
- Fragrance free: Working with fragrance oils or essential oils can alter how quickly a soap comes to trace, I opted to keep this soap unscented to make it easier for beginners, and because I love it's simplicity.
Ingredient Links
Supply Links
How To Make Tallow Soap A Step By Step Guide:
Gather Safety Supplies And Tools
- Dig out the safety glasses and some rubber gloves. You'll need them later. Make sure to wear a long sleeved shirt and pants.
- Find a heat proof bowl with at least a 2 quart capacity to mix your oils and a heat proof container for the lye solution with a capacity of at least 1 pint (500 ml).
- Collect a silicone spatula, a scale, a double boiler, soap molds, an immersion blender, digital thermometer or infrared thermometer.
Make The Lye Solution
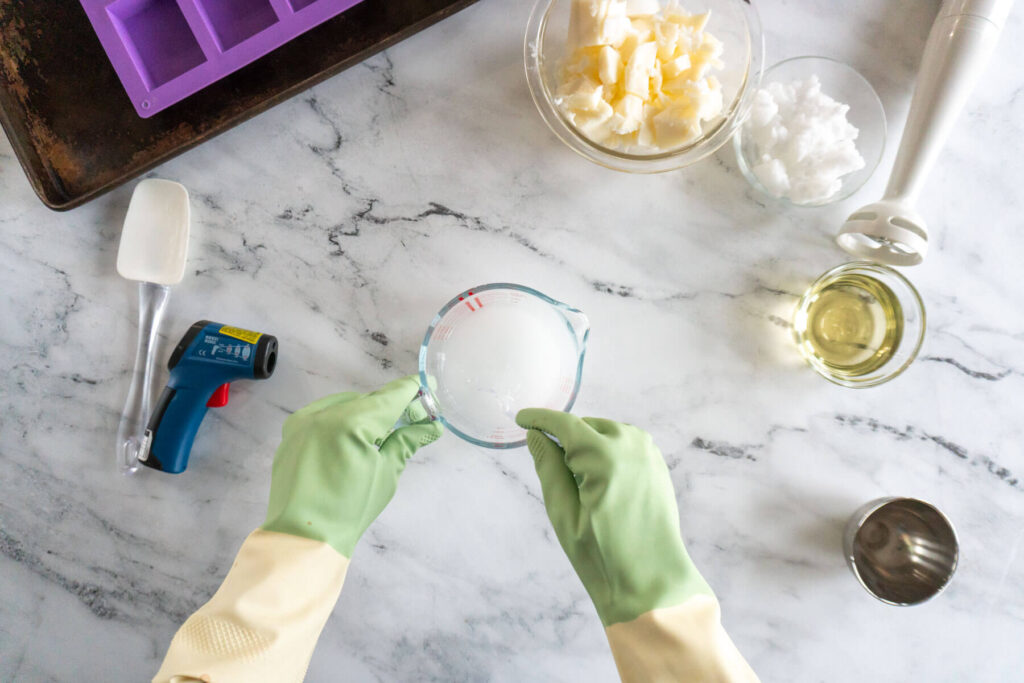
- Put on your safety glasses and rubber gloves.
- Weigh 190g cold water in a heat proof container with at least 500 ml capacity. I use a 2 cup glass pyrex jar. Weigh 69g lye crystals into a separate container.
- Carefully pour the lye into the water and stir well. Steam, fumes, and heat are byproducts of this chemical reaction and are very normal, but be cautious to not burn yourself.
- Set the lye somewhere safe to cool, in the kitchen sink is a great place - if it spills, it can be quickly and easily diluted.
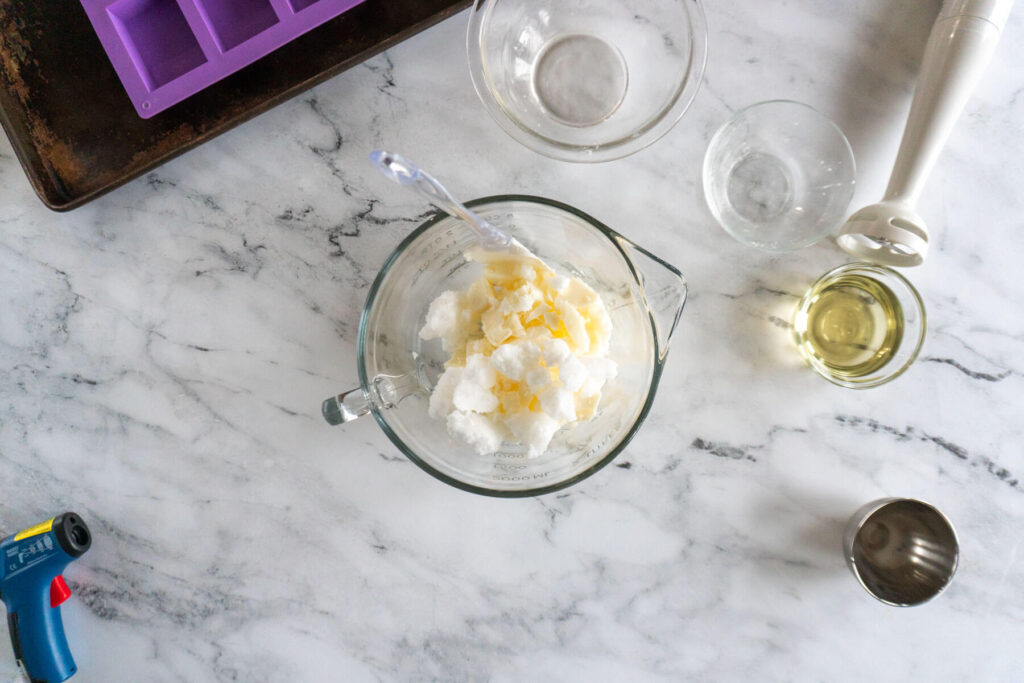
Prepare The Fats + Oils
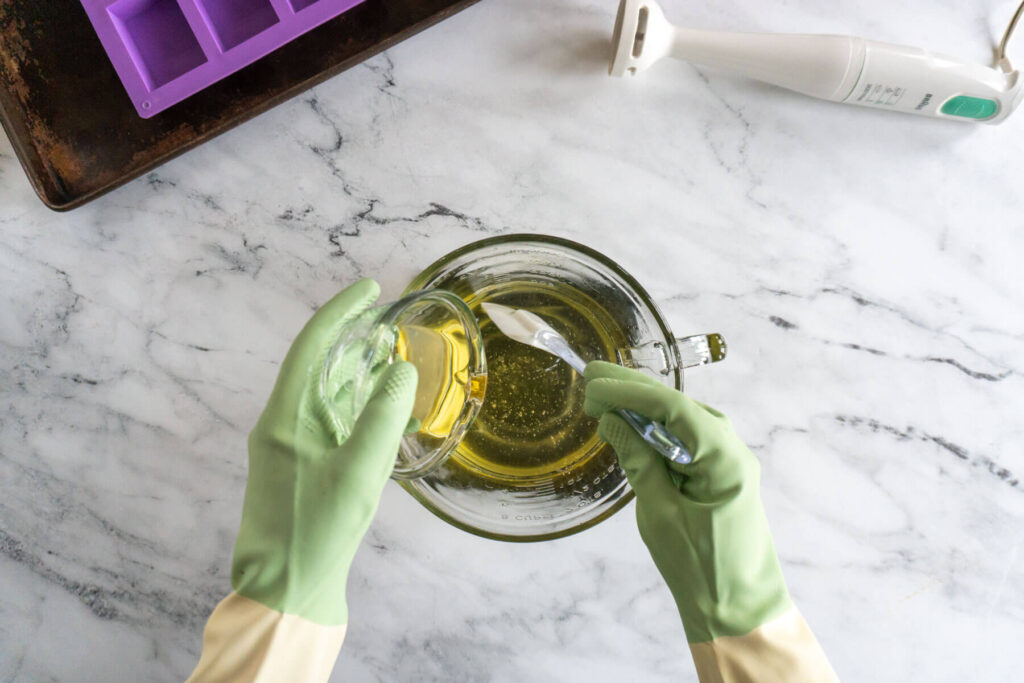
- In a heat proof mixing container, add 300g tallow and 100g coconut oil. Melt the solid oils and fats until completely liquified and combined then stir in 100g sweet almond oil.
Make Soap!
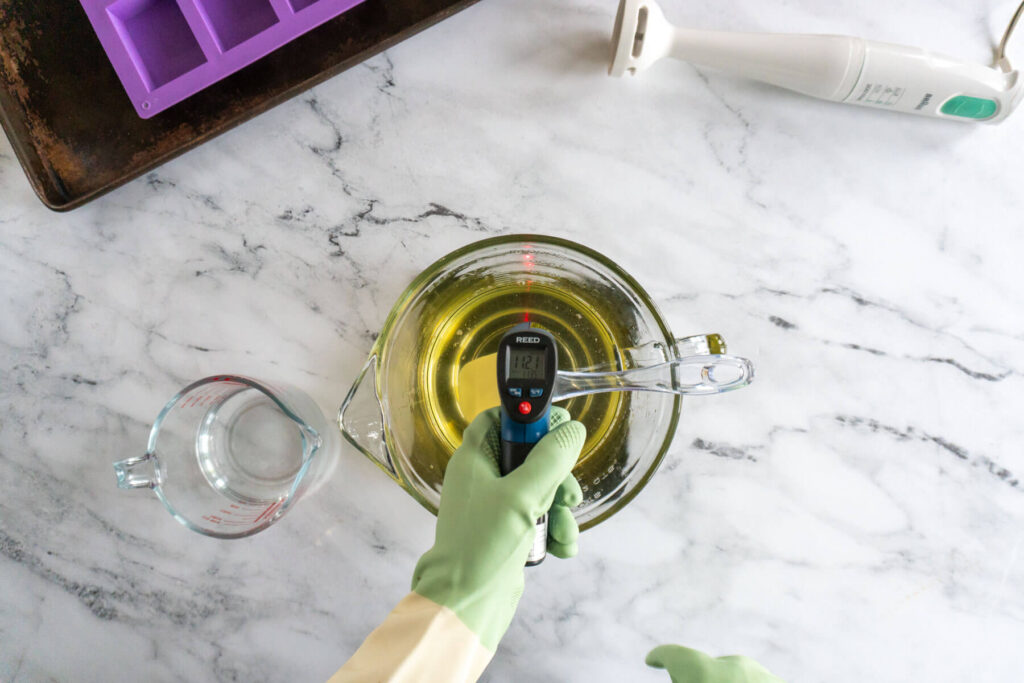
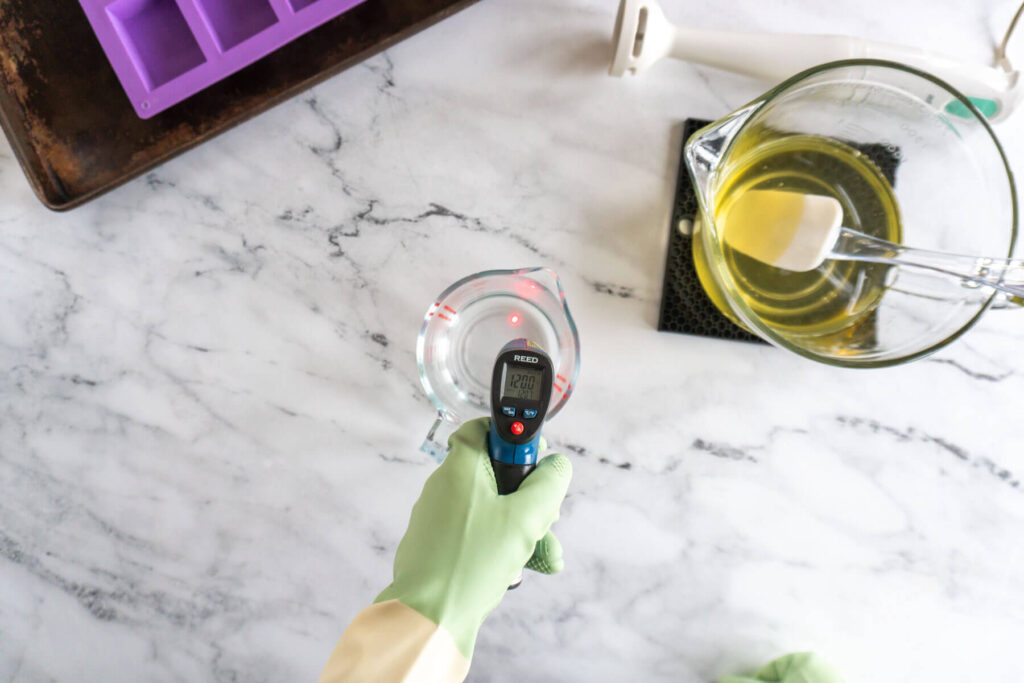
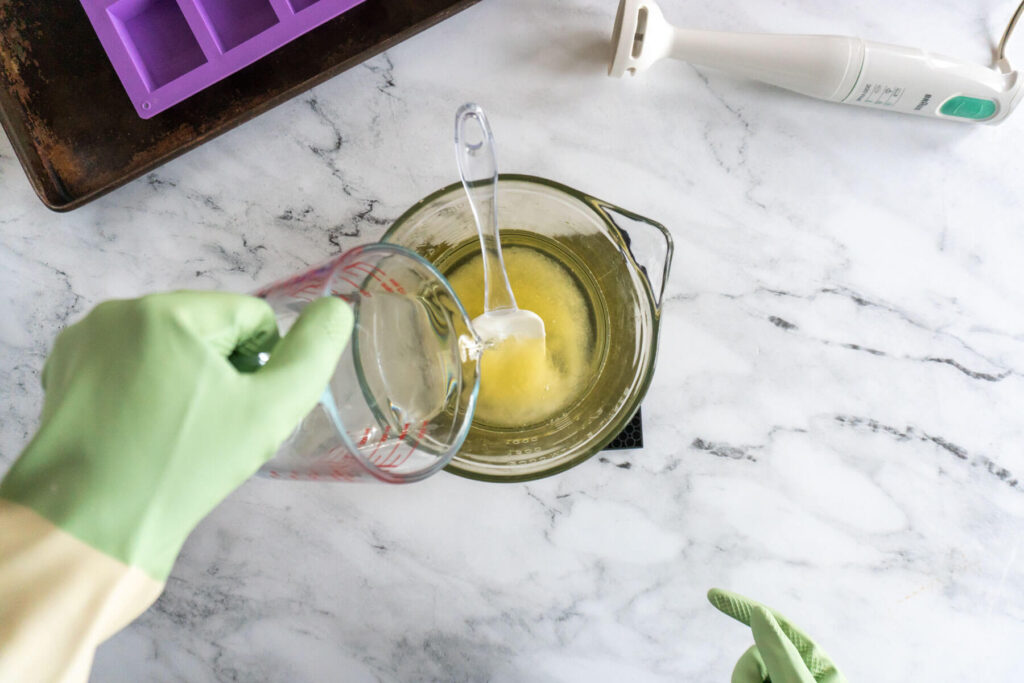
- Use your infrared thermometer to check the temperature of both the lye solution and oils. Once the lye solution is between 100 and 120f and the oils are within 10 degrees Fahrenheit, you can start soaping.
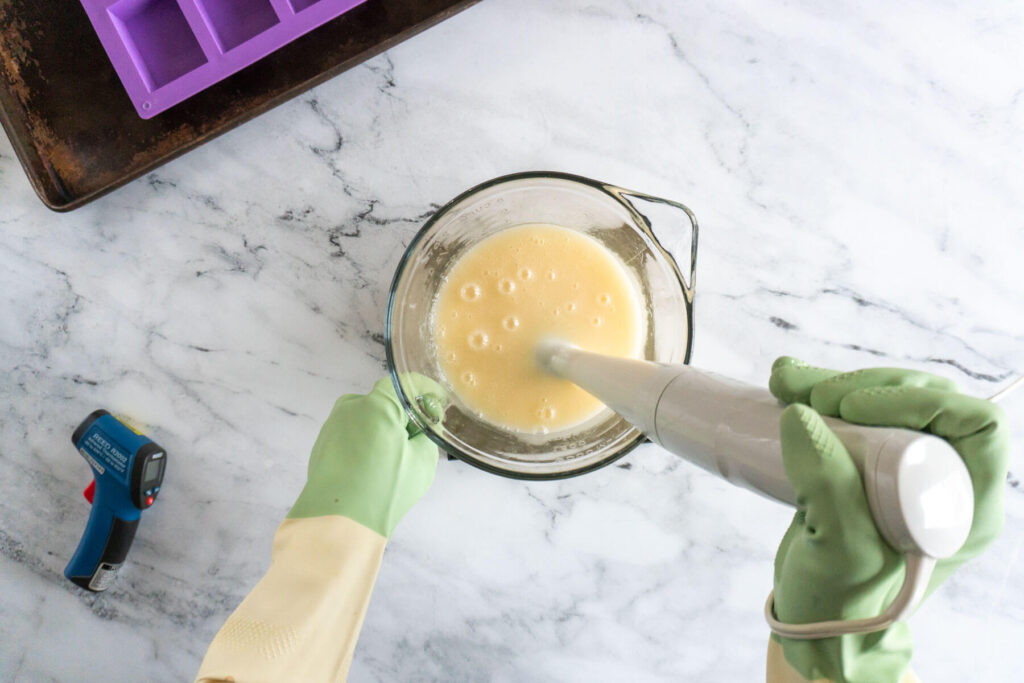
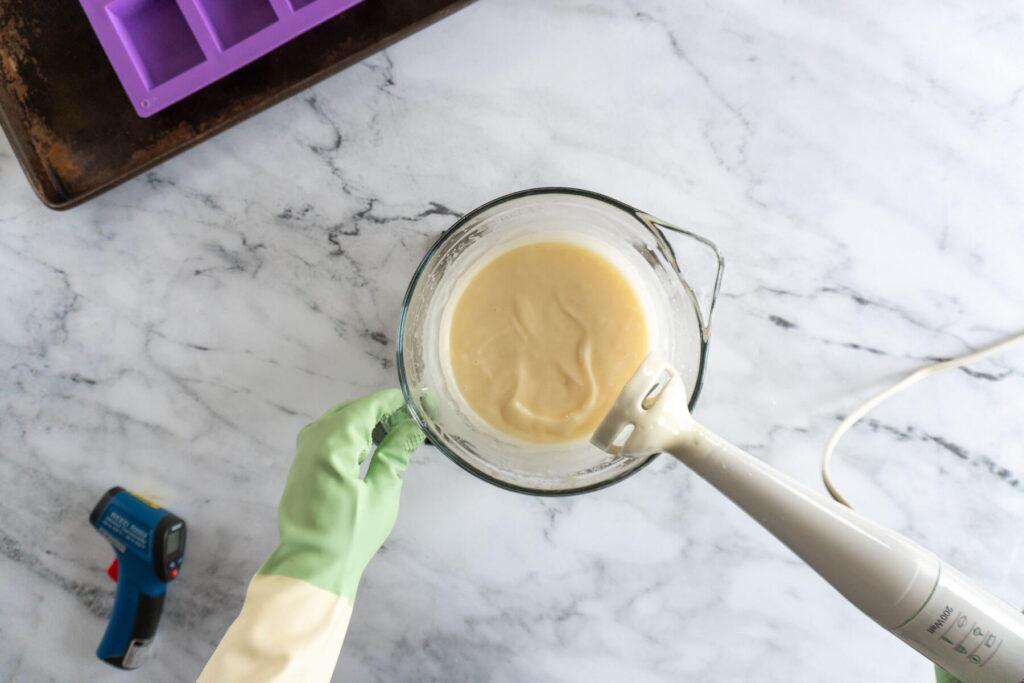
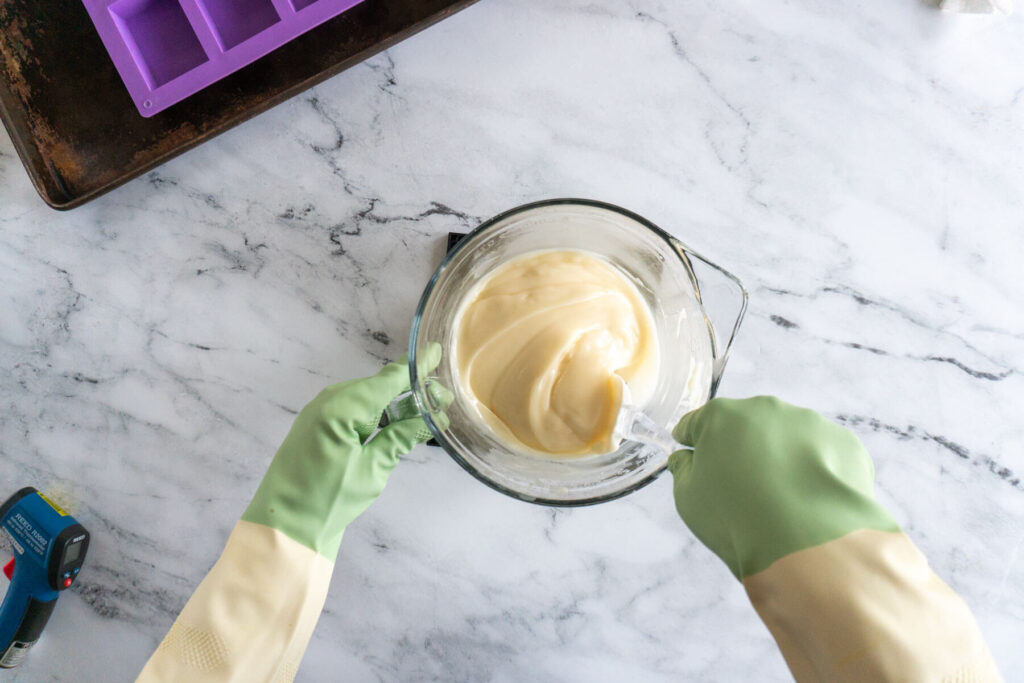
- Pour the lye solution into the heated oils and carefully place your immersion blender into the mixture, ensuring the blending head is covered at all times. Alternate between pulsing the blender on and off and stirring the mixture with a spatula. This recipe will take a longer time to come to trace because tallow is a slow moving fat.
- After pulsing and stirring for a while, the mixture will come to trace, which simply means it thickens. We're aiming for the consistency of pudding. You can tell it's come to trace by drizzling some of the sopa batter on top of itself. If the drizzles stay and don't sink away instantly, you're in trace.
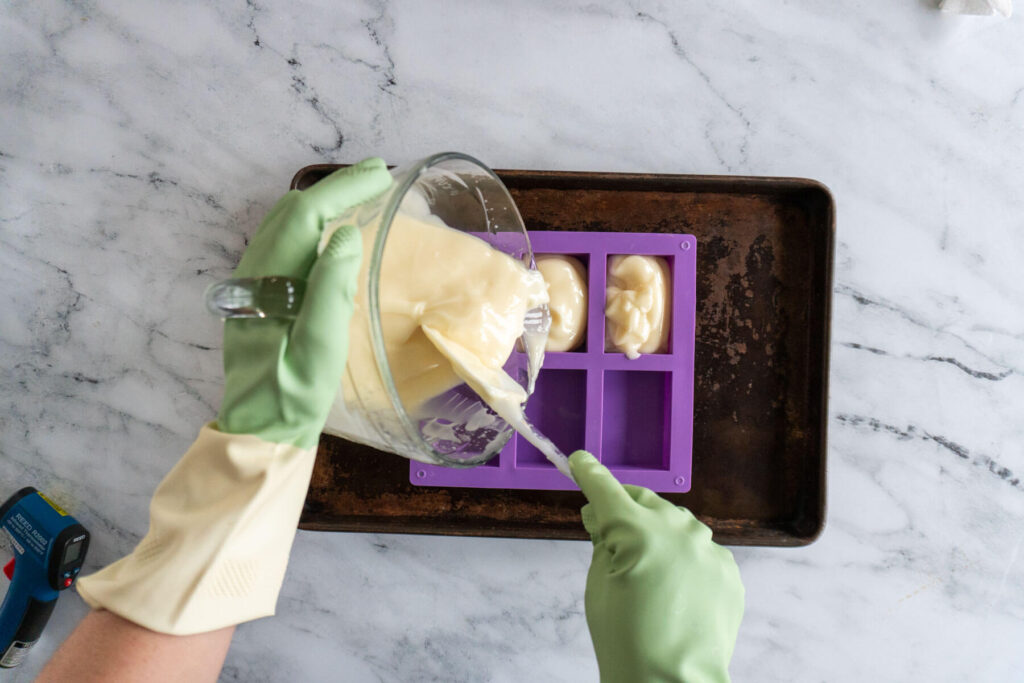
Transfer To Molds
- Place the soap molds onto a tray or baking sheet.
- Pour the soap batter into the molds. This recipe perfectly fills a 6 cavity soap mold plus one extra. If you only have one mold, you can always pour the rest into another mold or something from around the house, like an ice cube tray, silicone baking mold, Pringles can, anything with a smooth, shiny surface that the soap will pop out of.
- If desired, texture the top of the soap bars. You can use a spoon or a toothpick to add swirls.
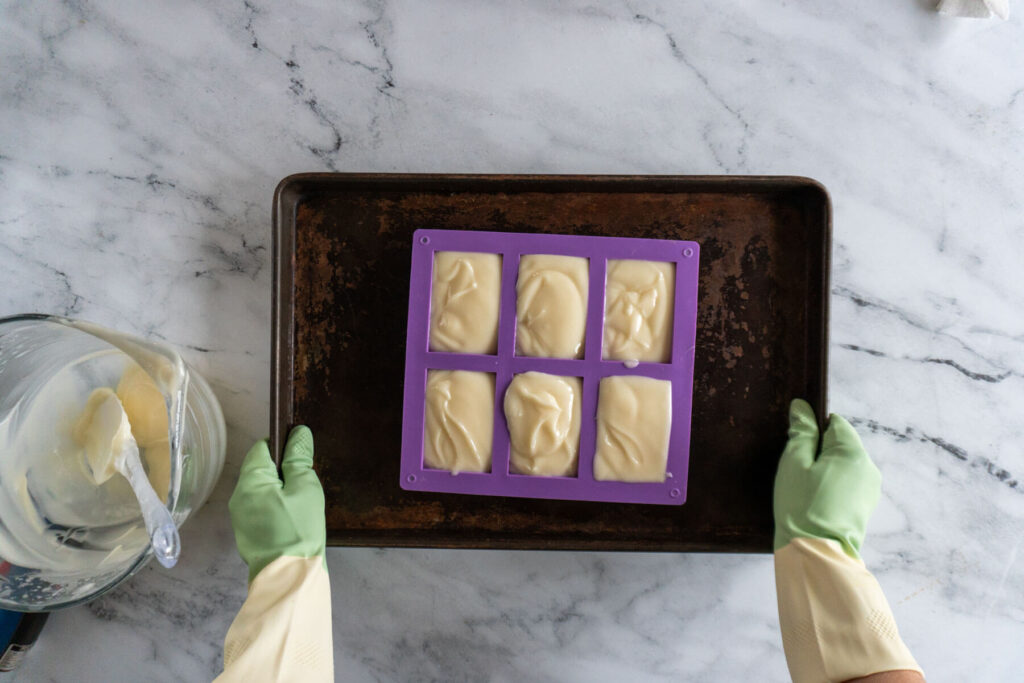
- Move the baking sheet somewhere that the soap can set for 48 hours.
Cure The Soap
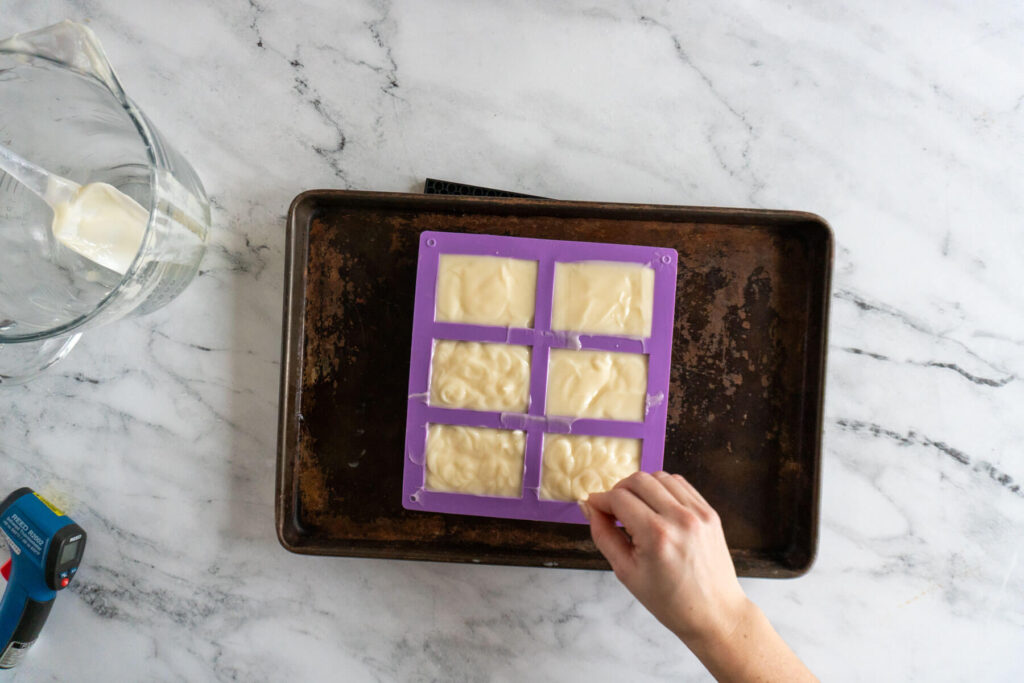
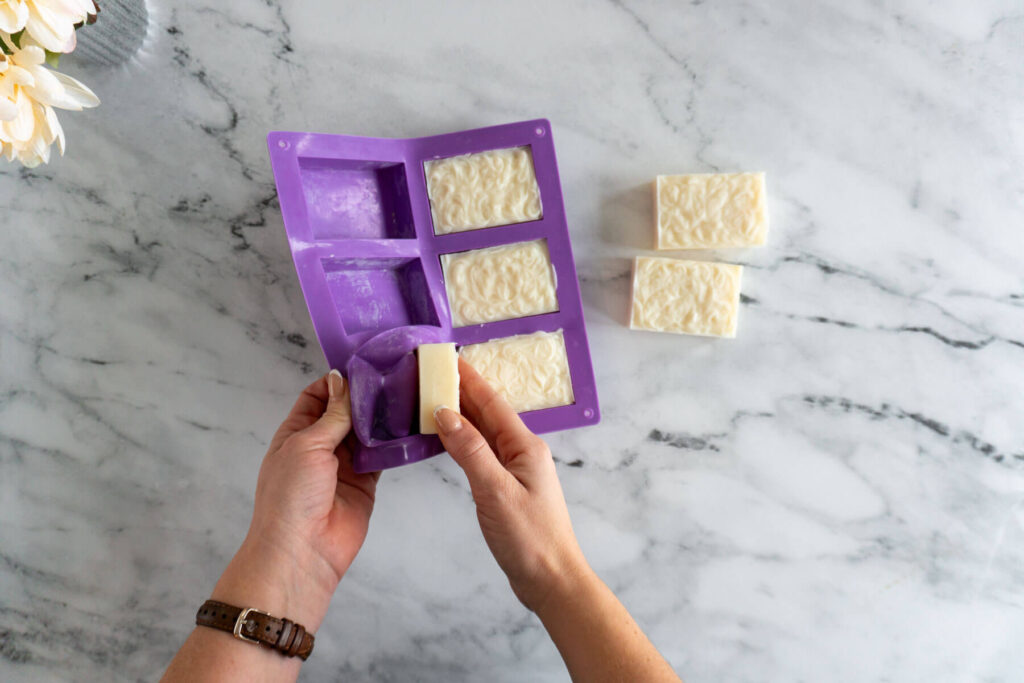
- After 48 hours, remove the soap from the molds. If the soap does not easily pull away from the edges of the molds, it may need longer to set, but after 48 hours, it should be firm enough to remove.
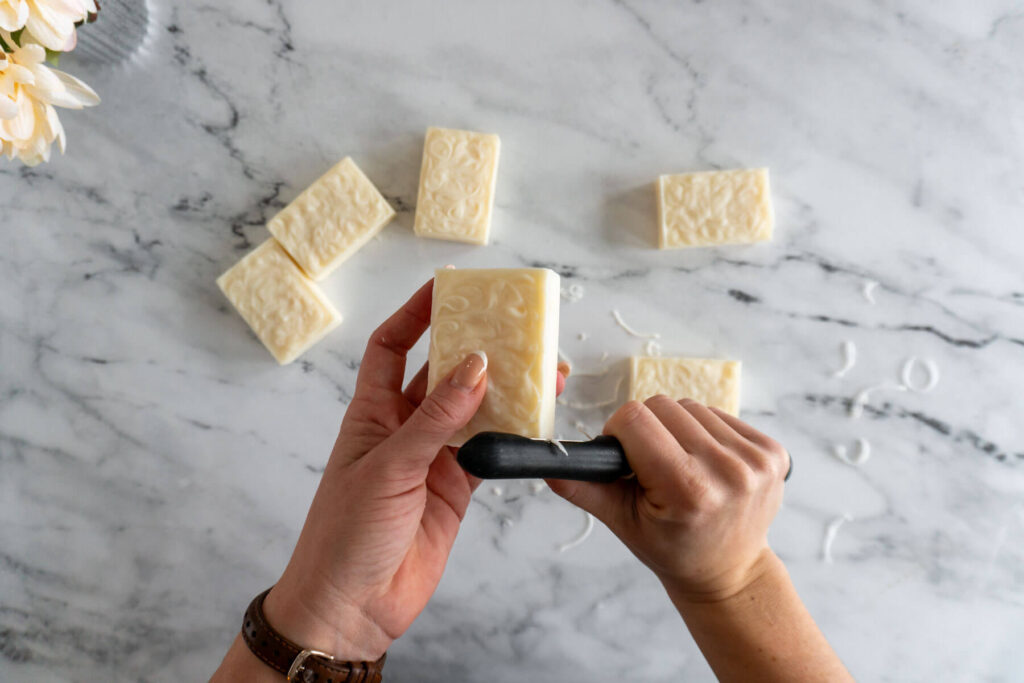
- Use a peeler to remove the sharp edges from the sides of the soap bars.
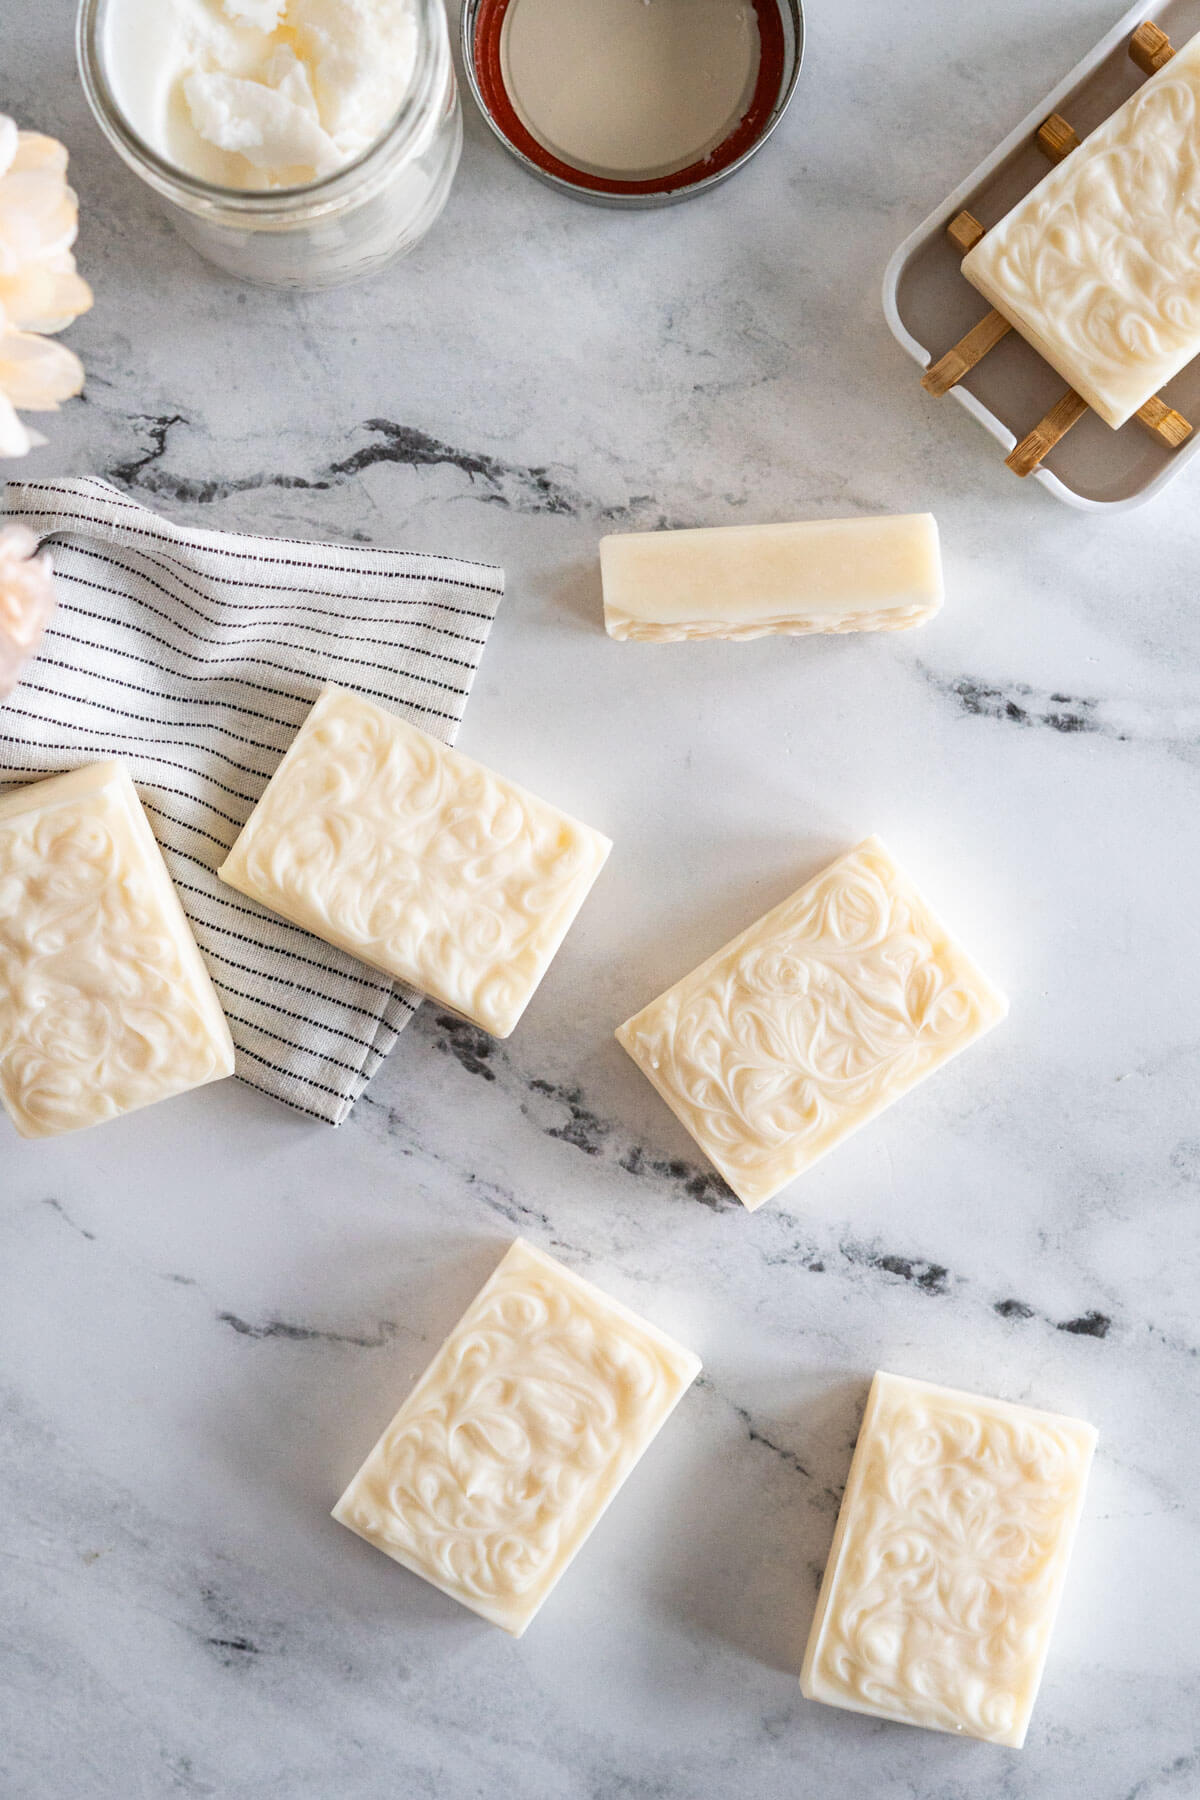
- Set the soap bars on end in a place with good airflow and allow to cure for at least 4 weeks. The curing time is very important when it comes to cold process soaps, this allows the saponification process to complete, excess moisture to evaporate and improves the longevity and lather of your soaps.
Batch + Storage
Batch
This recipe is written to have nice round numbers versus a perfect bar amount - so it will fill 7 of the rectangle shaped bar soap molds, as linked in the supply section above. I find when you're just getting into soap making, this is a great sized batch - it allows you to make a reasonable amount of soap that you'll work through in a reasonable amount of time!
Smaller batches also allow you to experiment more, as you'll have less soap to use up before you can try something new!
Storage
I keep my cured handmade tallow soap in an old shoe box in the basement. This location is perfect because it's low humidity, temperature controlled, and away from direct sunlight.
The shelf life of your soap is long, and I personally find that the longer the cure, the better the soap. Look to the expiration dates on your oils to help you determine your shelf life. The one with the shortest expiration date determines your shelf life.
Label Your Soap
I love to label my soap and other handcrafted goodies. I used my Munbyn thermal printer and transparent labels for this project.
You can get the label template for free as part of your Bloom Membership!
Homemade Tallow Soap
Equipment
- 1 immersion blender
- 1 double boiler or heat proof bowl 2 quart capacity
- 1 small rubber spatula
- 1 small heat proof container 2 cups capacity
- 1 pair of safety glasses
- 1 pair of rubber gloves
- 1 scale
- 2 soap molds 6 cavity
- 1 infrared thermometer
Materials
- 300 g grass fed tallow
- 100 g coconut oil unrefined
- 100 g sweet almond oil
- 190 g cold water
- 69 g lye (sodium hydroxide)
Instructions
Gather Safety Supplies And Tools
- Dig out the safety glasses and some rubber gloves. Make sure to wear a long sleeved shirt and pants. Find a heat proof bowl with at least a 2 quart capacity to mix your oils and a heat proof container for the lye solution with a capacity of at least 1 pint (500 ml). Collect a silicone spatula, a scale, a double boiler, soap molds, an immersion blender, digital thermometer or infrared thermometer.
Make The Lye Solution
- Put on your safety glasses and rubber gloves. Weigh 190g cold water in a heat proof container with at least 500 ml capacity. I use a 2 cup glass pyrex jar. Weigh 69g lye crystals into a separate container. Carefully pour the lye into the water and stir well. Steam, fumes, and heat are byproducts of this chemical reaction and are very normal, but be cautious to not burn yourself.
- Set the lye somewhere safe to cool, in the kitchen sink is a great place - if it spills, it can be quickly and easily diluted.
Prepare The Fats + Oils
- In a heat proof mixing container, add 300g tallow and 100g coconut oil. Melt the solid oils and fats until completely liquified and combined then stir in 100g sweet almond oil.
Make The Soap
- Use your infrared thermometer to check the temperature of both the lye solution and oils. Once the lye solution is between 100 and 120f and the oils are within 10 degrees Fahrenheit, you can start soaping.
- Pour the lye solution into the heated oils and carefully place your immersion blender into the mixture, ensuring the blending head is covered at all times. Alternate between pulsing the blender on and off and stirring the mixture with a spatula. This recipe will take a longer time to come to trace because tallow is a slow moving fat.
- After pulsing and stirring for a while, the mixture will come to trace, which simply means it thickens. We're aiming for the consistency of pudding.
Transfer Soap To Molds
- Place the soap molds onto a tray or baking sheet. Pour the soap batter into the molds. If desired, texture the top of the soap bars. You can use a spoon or a toothpick to add swirls.
- Move the tray somewhere that the soap can set for 48 hours.
Cure The Soap
- After 48 hours, remove the soap from the molds. If the soap does not easily pull away from the edges of the molds, it may need longer to set, but after 48 hours, it should be firm enough to remove. Use a peeler to remove the sharp edges from the sides of the soap bars.Set the soap bars on end in a place with good airflow and allow to cure for at least 4 weeks. The curing time is very important when it comes to cold process soaps, this allows the saponification process to complete, excess moisture to evaporate and improves the longevity and lather of your soaps.
Notes
Batch
This recipe perfectly fills a 6 cavity soap mold plus one extra. If you only have one mold, you can always pour the rest into another mold or something from around the house, like an ice cube tray, silicone baking mold, Pringles can, anything with a smooth, shiny surface that the soap will pop out of. I find when you're just getting into soap making, this is a great sized batch - it allows you to make a reasonable amount of soap that you'll work through in a reasonable amount of time! Smaller batches also allow you to experiment more, as you'll have less soap to use up before you can try something new!Storage
I keep my cured handmade tallow soap in an old shoe box in the basement. This location is perfect because it's low humidity, temperature controlled, and away from direct sunlight. The shelf life of your soap is long, and I personally find that the longer the cure, the better the soap. Look to the expiration dates on your oils to help you determine your shelf life. The one with the shortest expiration date determines your shelf life.Soap Formula
Pin This Tallow Soap Recipe!
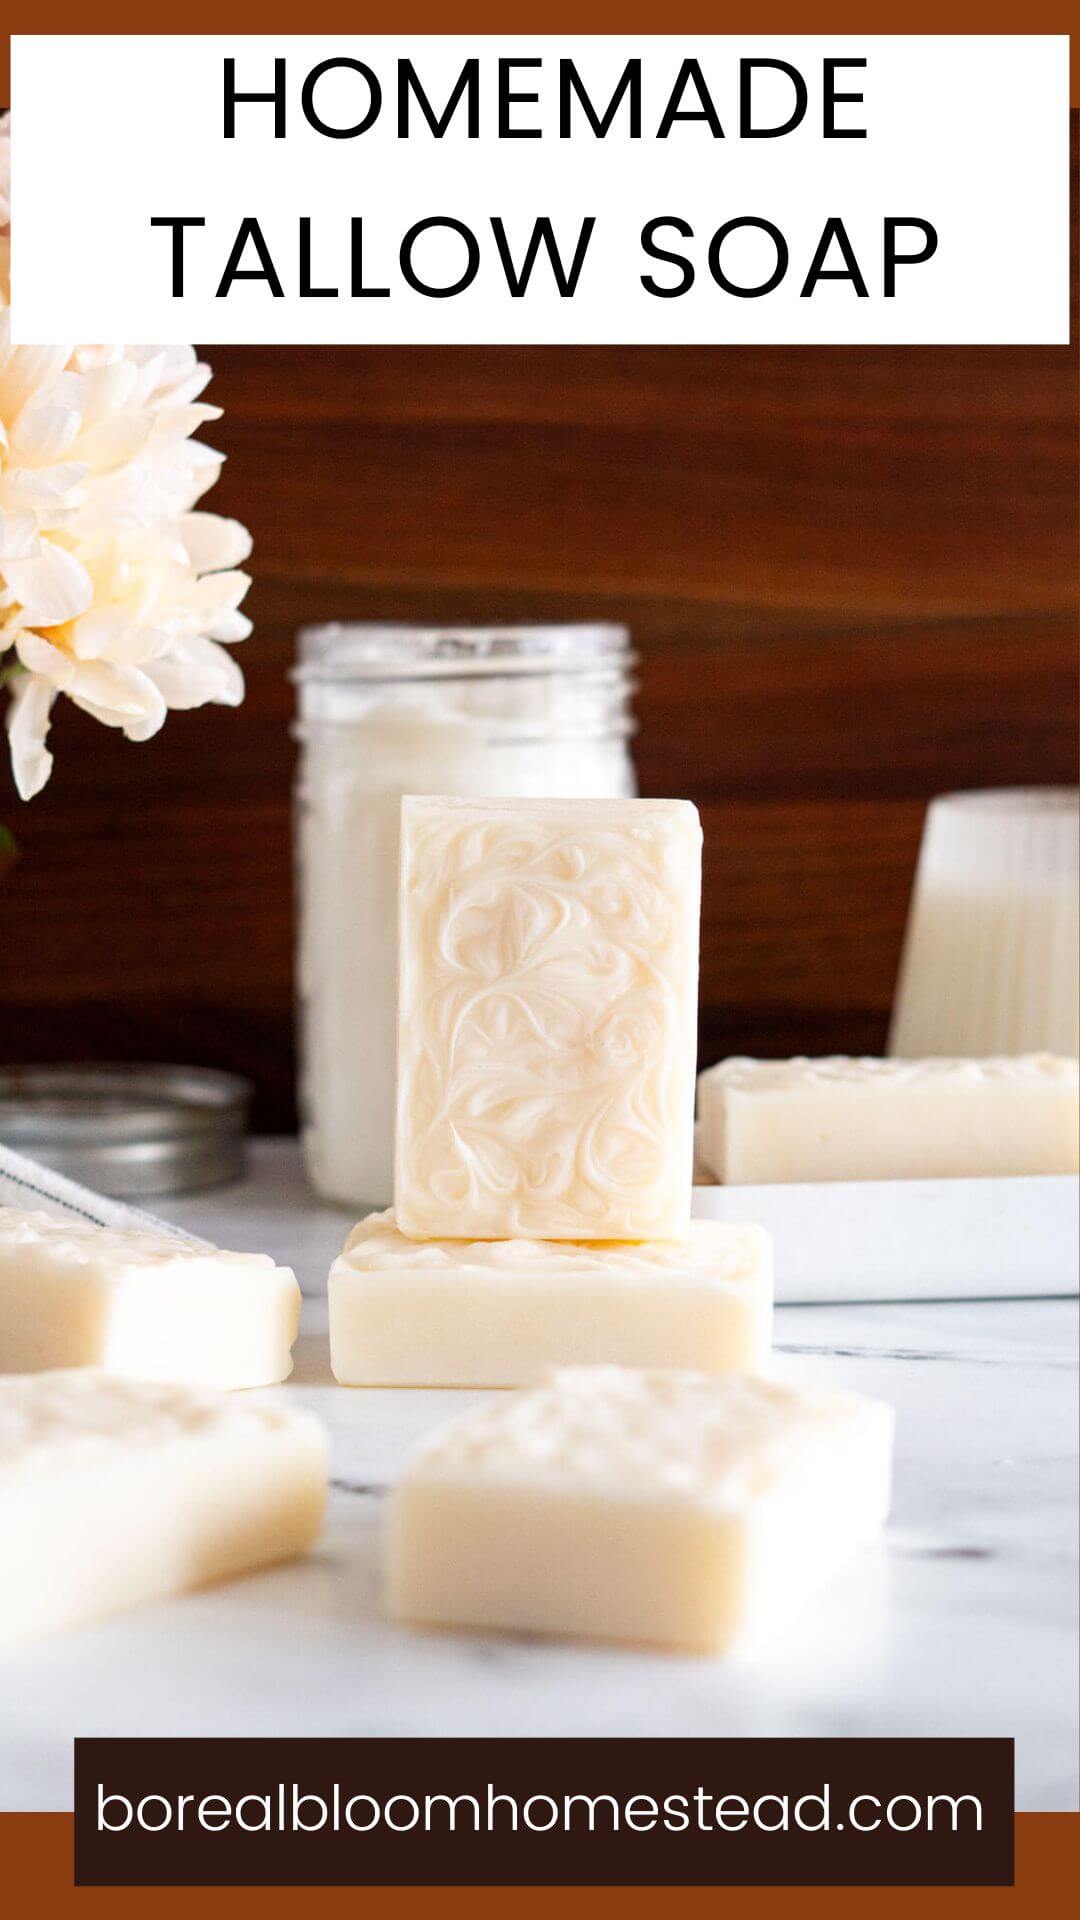
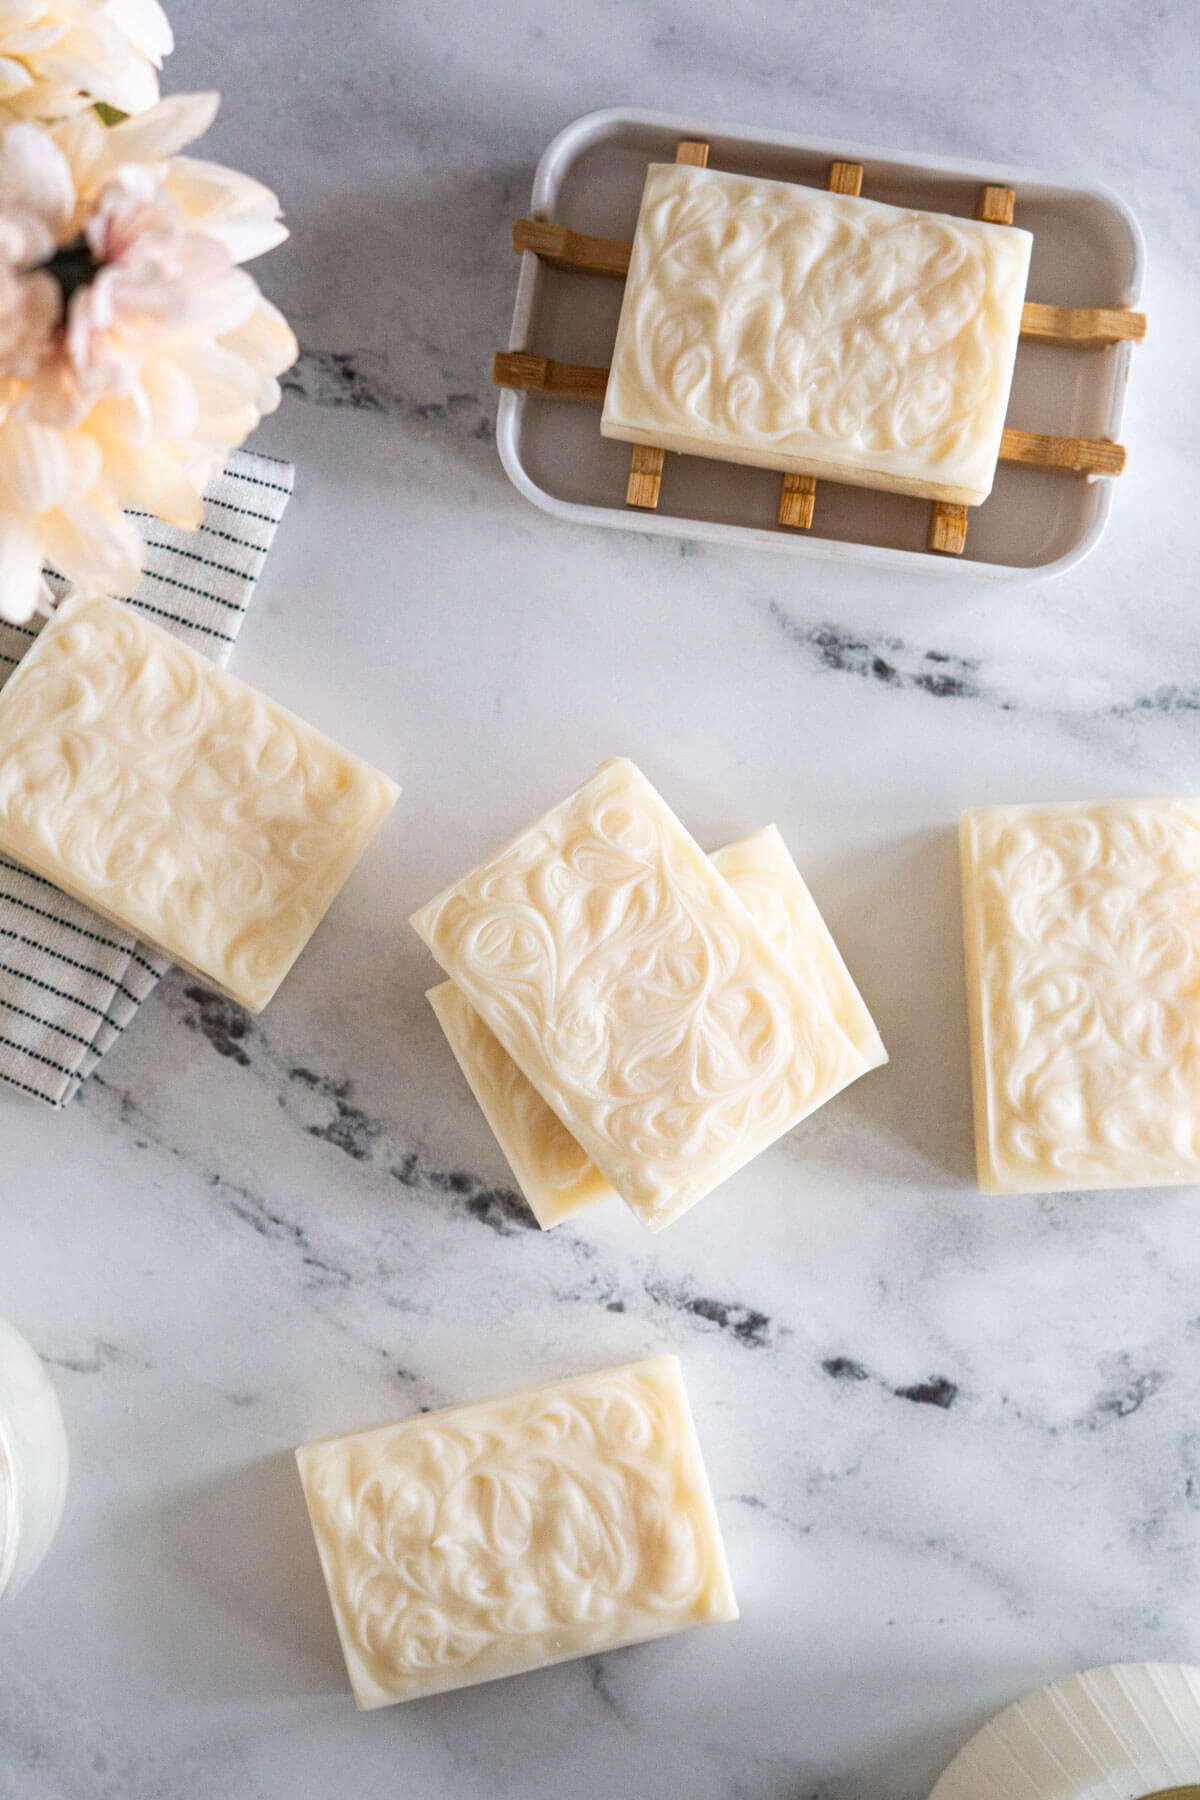
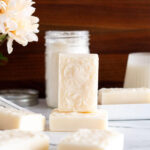
Tallow soap is so worth the effort and cure time! The bars are a creamy white and feel SO good to use!