Harvesting Honey
Getting started beekeeping is so exciting, but do you know what's even better than that?
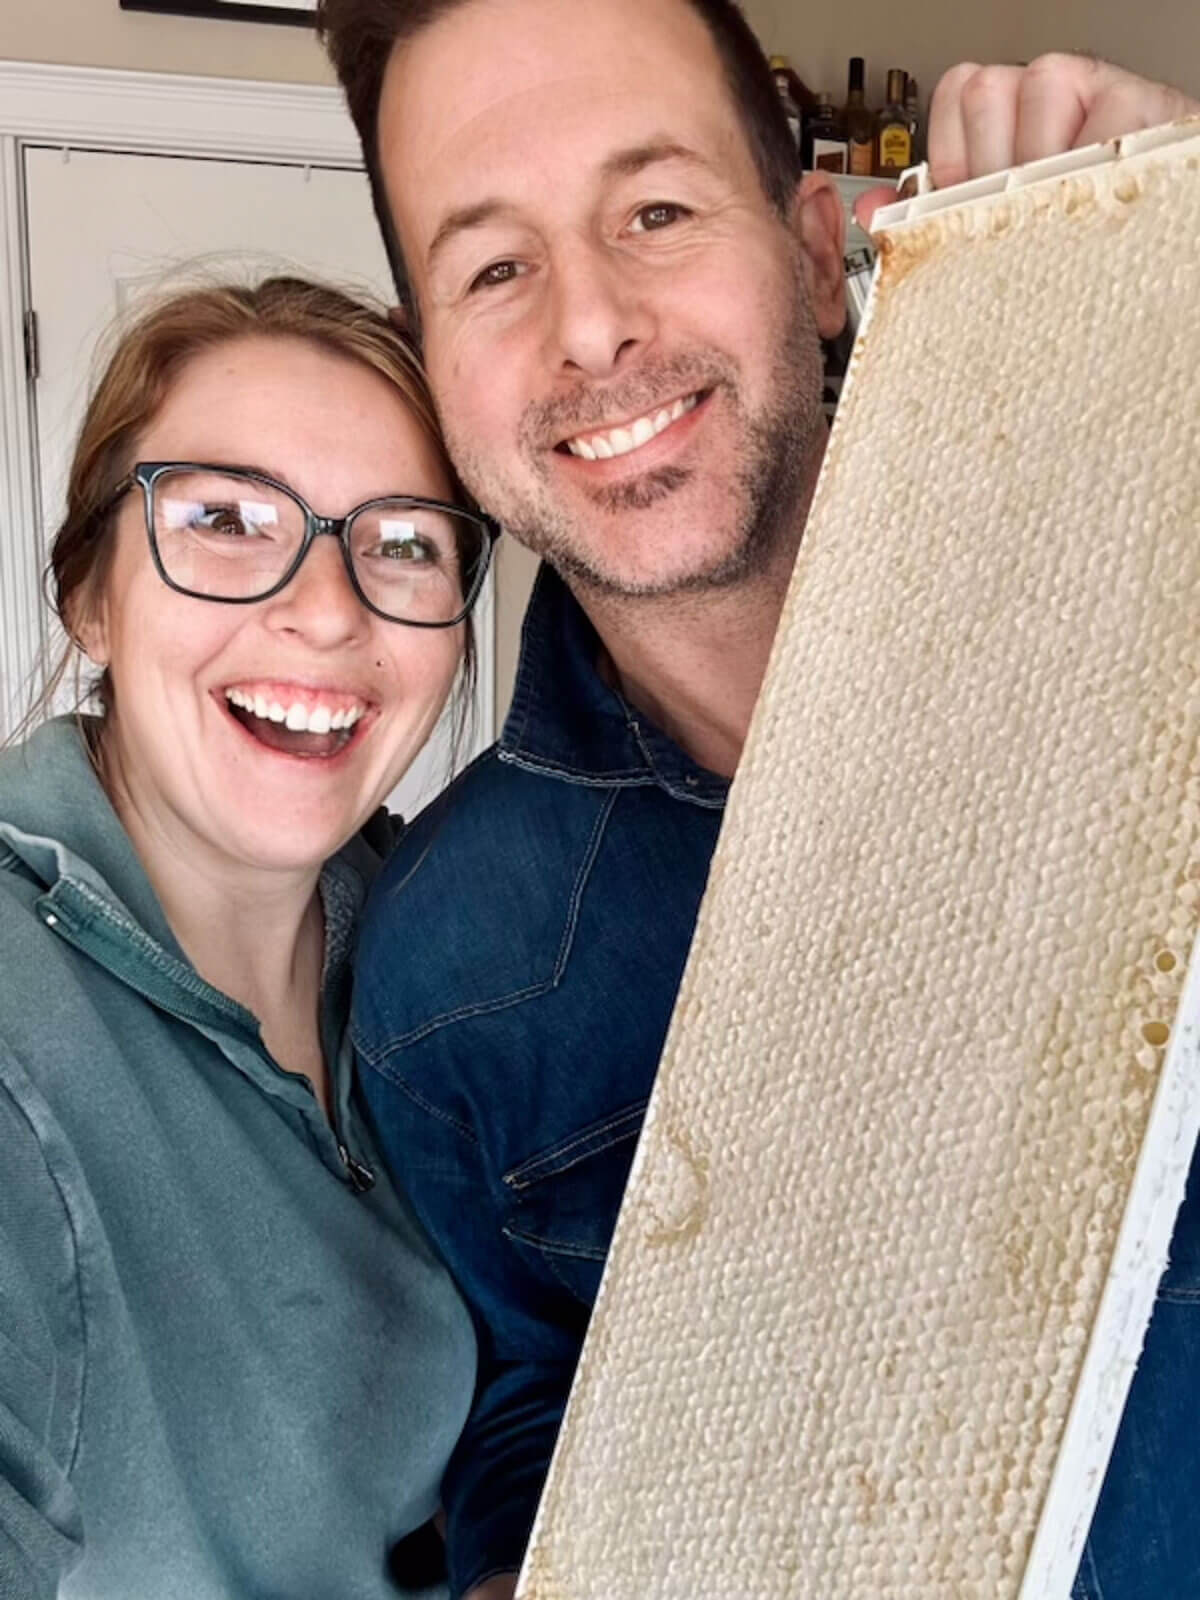
Your first honey harvest!
Kevy and I grin from ear to ear each time we harvest and extract honey. I guarantee that at least some of it is a sugar rush from eating so much raw honey in such a short period... Ha!
Jump to:
When To Harvest Honey
Here in Alberta, we are able to harvest honey twice per season.
Early honey, or spring honey, is harvested at the end of July. It's kind of a misnomer for us to call it spring honey when it's collected and extracted right smack in the middle of summer, but I don't make the rules!
I suspect that in more forgiving climates with longer growing season that spring honey is harvested in tune with the closing of the spring season, but our 90 day growing season sure makes for an interesting (hot and heavy) honey season!
Then there's what I call "honey". Some consider this main season or summer honey, I choose to just call it honey to differentiate it from our spring honey. Here, we harvest our main season honey between the end of August and the first killing frost.
BUT one important thing to remember is that dates are NOT important when you're talking honey harvests. Each and every year is different from the years proceeding it. So you'll need to keep up on your hive inspections to monitor when the nectar flow starts and ends so you know when to harvest your honey supers.
If you know the flow is over, the honey is sufficiently capped, and ready to be harvested but you're not ready, you're best off to just leave the supers with the bees. They will take care of it until you're ready!

How Much Honey To Harvest
This depends on where you're located, and your beekeeping habits. This is a great reason to join a local beekeeping club or find a local beekeeping mentor - what works in one area and climate doesn't always apply to others.
Honey yields also change from year to year. Depending on the intensity of the nectar flow, the strength of your hives, and the length of dearths.
We run double deep brood boxes on our hives here and once the nectar flow starts, we place a queen excluder on top of the brood boxes and a honey super on top of that. Anything the bees give us in the honey supers is ours to take and anything in the deep supers belongs to the colony.
More Beekeeping Goodness


A Note About Honey Supers
I shared a list of supplies in my guide to getting started with beekeeping and I specifically mentioned medium honey supers and frames in that beekeeping supplies list.
We opted to use medium supers and white frames for all of our honey boxes, while we use black plastic or wooden frames and deep boxes for our brood chambers.
Using a different size for the honey boxes has two benefits:
- a deep super full of honey weighs as much as 90 pounds, while a medium super weighs between 40-50 pounds. After a full day of tossing boxes your arms and back will be happy you chose medium supers!
- Using a different color and different size of frames means that they are obviously different than the deep frames for the brood chamber and cannot be confused with each other. This helps to isolate your honey supers from contamination by your mite treatments and bee larvae etc.

How To Harvest Honey
1. Clear The Super
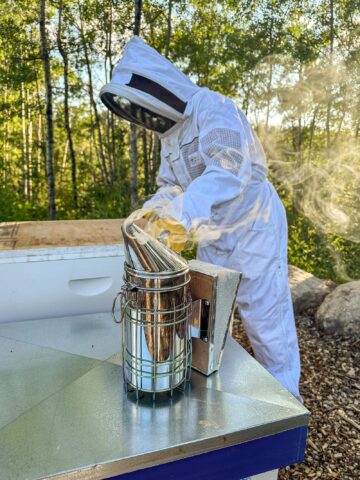
Every beekeeper has their own way of clearing the bees out of the honey super, but the important thing is that it must be done and done thoroughly. Nobody wants to bring bees into their home, garage, or honey extracting area - that's a recipe for a sting!
Blower
We purchased a small battery powered blower, and we've used it to blow the bees from the boxes. The basic steps for that are to remove the honey super from the beehive and set it on it's side with the frames in a vertical orientation, then blow the bees out of the super from the top through the bottom. This method works, but it is definitely more physically demanding.
Bee Brush
Our new method of clearing bees from the honey supers is to place an empty super on our hand cart, and remove the frames one by one, brush the bees from the frames, and place them into the empty super covering the top after each frame is inserted. The newly empty super gets stacked on top of the first and the process is repeated until all supers have been harvested. This method takes longer, but is less physically demanding when it comes to heavy lifting.
Bee Escape
We are going to try Quebec Bee Escapes next season, which is a bee excluder, this board allows the bees to leave the super but not return. This method requires lifting the full honey supers, placing the bee escape board, and returning the honey super to the hive. Bee escapes can only be left on the hives for 2 or so days, afterwards, the bees figure out how to get through them and you've got to use another method to clear the hive.

2. Transport And Store
Once the frames have been harvested from the hive, they should be transported to your bee extraction location. For us, that's our kitchen! (We are developing a honey extracting room in the basement, so stay tuned for updates on that!)
I personally prefer to extract the honey within an hour of it leaving the hive - at this point, the honey is still warm and fluid, the wax is soft enough to work with, and the process is incredibly quick and easy.
If you're not planning on extracting right away, it's a good idea to store your honey somewhere between 70-77F (or 21-25C) to ensure the honey stays fluid enough to extract, cool honey is thick honey and it ends up being a ton more work.

3. Uncap
Now comes the fun part! Before you can put your honey supers into your extractor, you'll have to uncap the honey comb.
There are a couple of ways to do this on the hobby beekeeper scale:
- Uncapping knife - these are long, thin knives that slide along the outside of the frame uncapping the honey. A bread knife also works. You can get them in serrated, non-serrated, and even heated! We prefer not to use uncapping knives cause I find them to be a bit destructive of the honeycomb especially if you'e got an unsteady hand.
- Uncapping fork - These forks have many tines with a sharp point on the end of each one. Many beekeepers use these to scratch the cappings that were missed by the knives in a low spot. We actually prefer these, though we use them to slide under the caps and flick our wrists to pop off the cappings. Kevy and I find this to be a less destructive method of uncapping as we are just popping off the very top of the cap.
Our first year of honey harvesting, we used an aluminum chafing pan with a wire mesh cooling rack placed in the bottom to rest our frames on for uncapping. The second year, we invested in an uncapping tank. While the tray and rack worked, the uncapping tank was a definite upgrade.


4. Load The Extractor
Once the frames are uncapped, they need to be loaded into your extractor. This takes a little bit of patience and forethought, especially if you have a large extractor like we do. Because the extractors spin so rapidly, it's very important to ensure that the frames are loaded in a balanced fashion or your extractor will be thrown out of whack when spinning.
So far, our best results have been to pack frames with similar weights directly across from each other, filling in the gaps in between.
Pro Tip: Make sure your honey gate is closed and latched tightly before you begin extracting.


5. Extract The Honey
Turn the extractor on low, and slowly increase the speed, watching both the bottom of the extractor and the sides to monitor the progress. If the extractor starts to wobble, you'll need to stop the extraction and shuffle your frames to try to balance them better.
Watching the amount honey hit the sides of the extractor can tell you if the frames are fully extracted or not.
Once you notice the bottom of the extractor filling with honey, it's time to filter. Depending on your extractor size and how full your frames are, you should make it through one full cycle before straining, but you may need to stop during the spin to drain some honey.

6. Filter The Honey
Once the base of the extractor has been filled with honey, it's time to place a food safe bucket topped with a dual stage honey filter on top of the bucket and open the honey gate.
I lied, this is actually the fun part!! Haha. Watching your homegrown liquid honey flow out of the honey gate for the first time each season is such a rush.
At this point, it's important to watch the honey filter, you don't want to overfill it, so you may have to moderate the flow that comes out of the honey gate.
Once the bucket is full, transfer your filter to another bucket and repeat the process until you're done harvesting. Scrape any of the cappings and honey from your uncapping station into the filter and allow it to strain.
When you're done filtering, cover your honey and allow it to settle for at least 24 hours before moving on to bottling.

7. Bottle The Honey
Once the honey has settled for 24 hours, you'll notice a layer of stuff at the top. This is just rogue wax pieces that made it through the filter and bubbles. You can either scrape it off, but I like to take a piece of plastic wrap and spread it over the top, pressing down slightly. When you remove the plastic wrap, most of the debris comes off with it and you're left with a very small amount of skimming.
Place a digital scale under the honey gate in your bucket, then set a jar on the scale and zero (tare) the scale. From here you can fill each jar to the appropriate weight. We usually bottle our honey in 500g and 1000g (1kg) jars, which are 375ml and 770ml jars, respectively.
Pro Tip: You probably only need to weigh your honey jars once. Once you find the sweet spot for the fill line, each jar comes out the proper weight give or take~5g.

8. Label The Honey
Seal up the jars, wipe off any sticky honey, and label them with the date!
I love to label my homestead goodie. I used my Munbyn thermal printer and transparent labels for this project. I created the labels in Canva.

That's a Wrap on Harvesting Honey!
Pulling your own honey, spinning it out, and watching that golden goodness flow is seriously one of the best parts of beekeeping. It’s messy, it’s sticky, and if you’re anything like us, you’ll probably eat way too much of it in the process—but man, is it ever worth it!
Every harvest is a little different, and the more you do it, the more you’ll dial in your process. But no matter how many times we’ve done it, that first taste of fresh, homegrown honey never gets old.
So, here’s to full supers, smooth extractions, and jars upon jars of liquid gold!
Pin This Guide To Extracting Honey!

Comments
No Comments