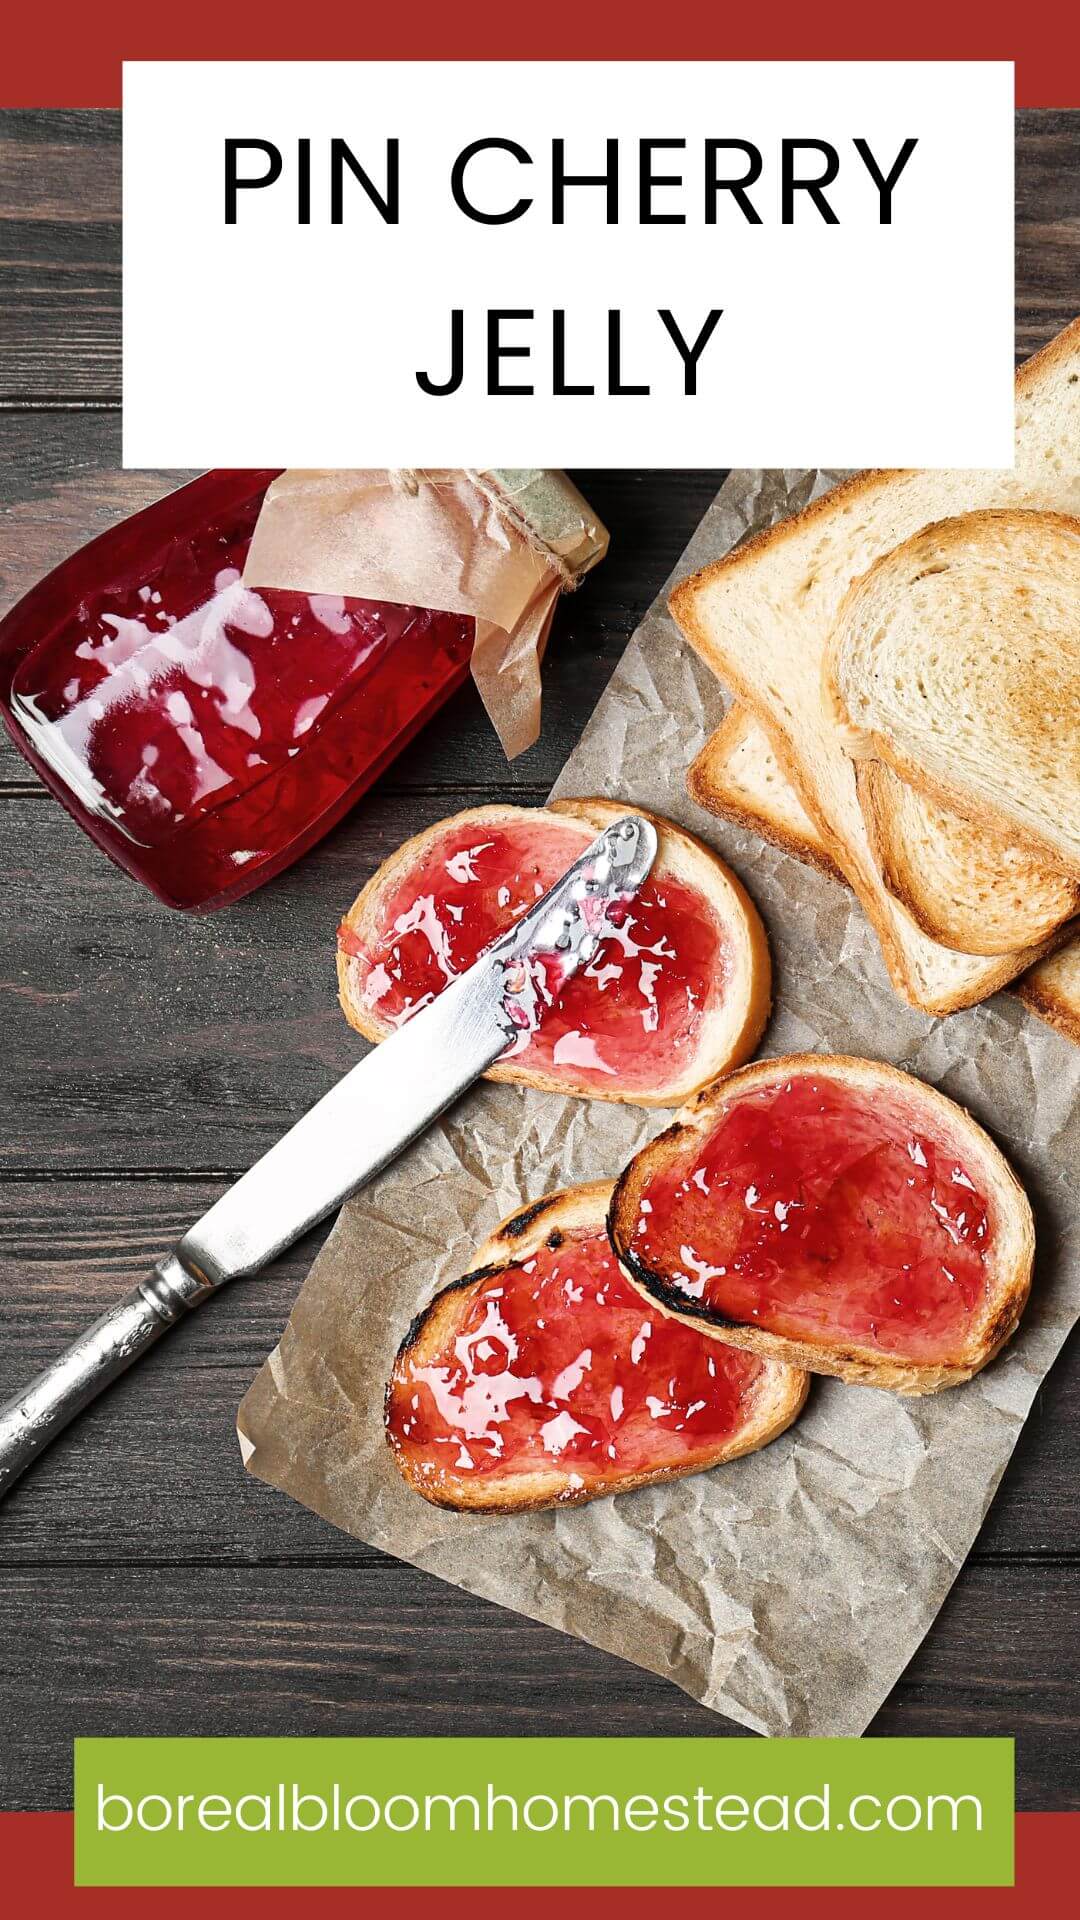
Pin Cherry Jelly
Learn how to make a unique and flavorful preserve from foraged berries. Pin cherry jelly is sweet and tangy and worth the effort!
We are blessed to live in an area with abundant wild edibles. I use the word blessed and abundant quite liberally here. In our zone 3 climate, the available forage is always going to be less substantial than in other, warmer places. That said, our 10 acres are alive with amazing edibles.
The brush along our front lawn is bursting at the seams with saskatoons, beaked hazelnuts, and pin cherries!
A couple of days ago, those little shiny rubies caught my eye. Even though this is the time of year for garden harvests, canning, dehydrating, and preserving, I made time to gather some pin cherries.
This pin cherry jelly recipe is dedicated to local abundance.

Jump to:
What Are Pin Cherries?
Pin cherries (Prunus pensylvanica) are native wild cherries that can be found throughout Canada, in the Boreal region, and beyond, as well as in much of the United States. They are commonly found at woodland edges, riverbanks, sites with disturbed soil, and in areas burned by wildfire.
Pin cherries are also known as fire cherries because like fireweed, they are a pioneer species that quickly colonizes areas burned by wildfire. These fast-growing trees are sunseekers and grow rapidly to create a canopy for other, slower-growing species.
Due to the fruit's small size and seemingly lacking flesh, they have somewhat fallen out of favor for named varieties with more fruit, but trust me, they are worth the work to harvest, even if each only has a small amount of tasty flesh!

Identifying Pin Cherries
The fruit is small, hence the name, only about ½ inch in diameter, and has a bright red color with a small pit inside. The skin is thin and the flesh is juicy with a tart flavor and astringent, mouth-drying sensation when raw.
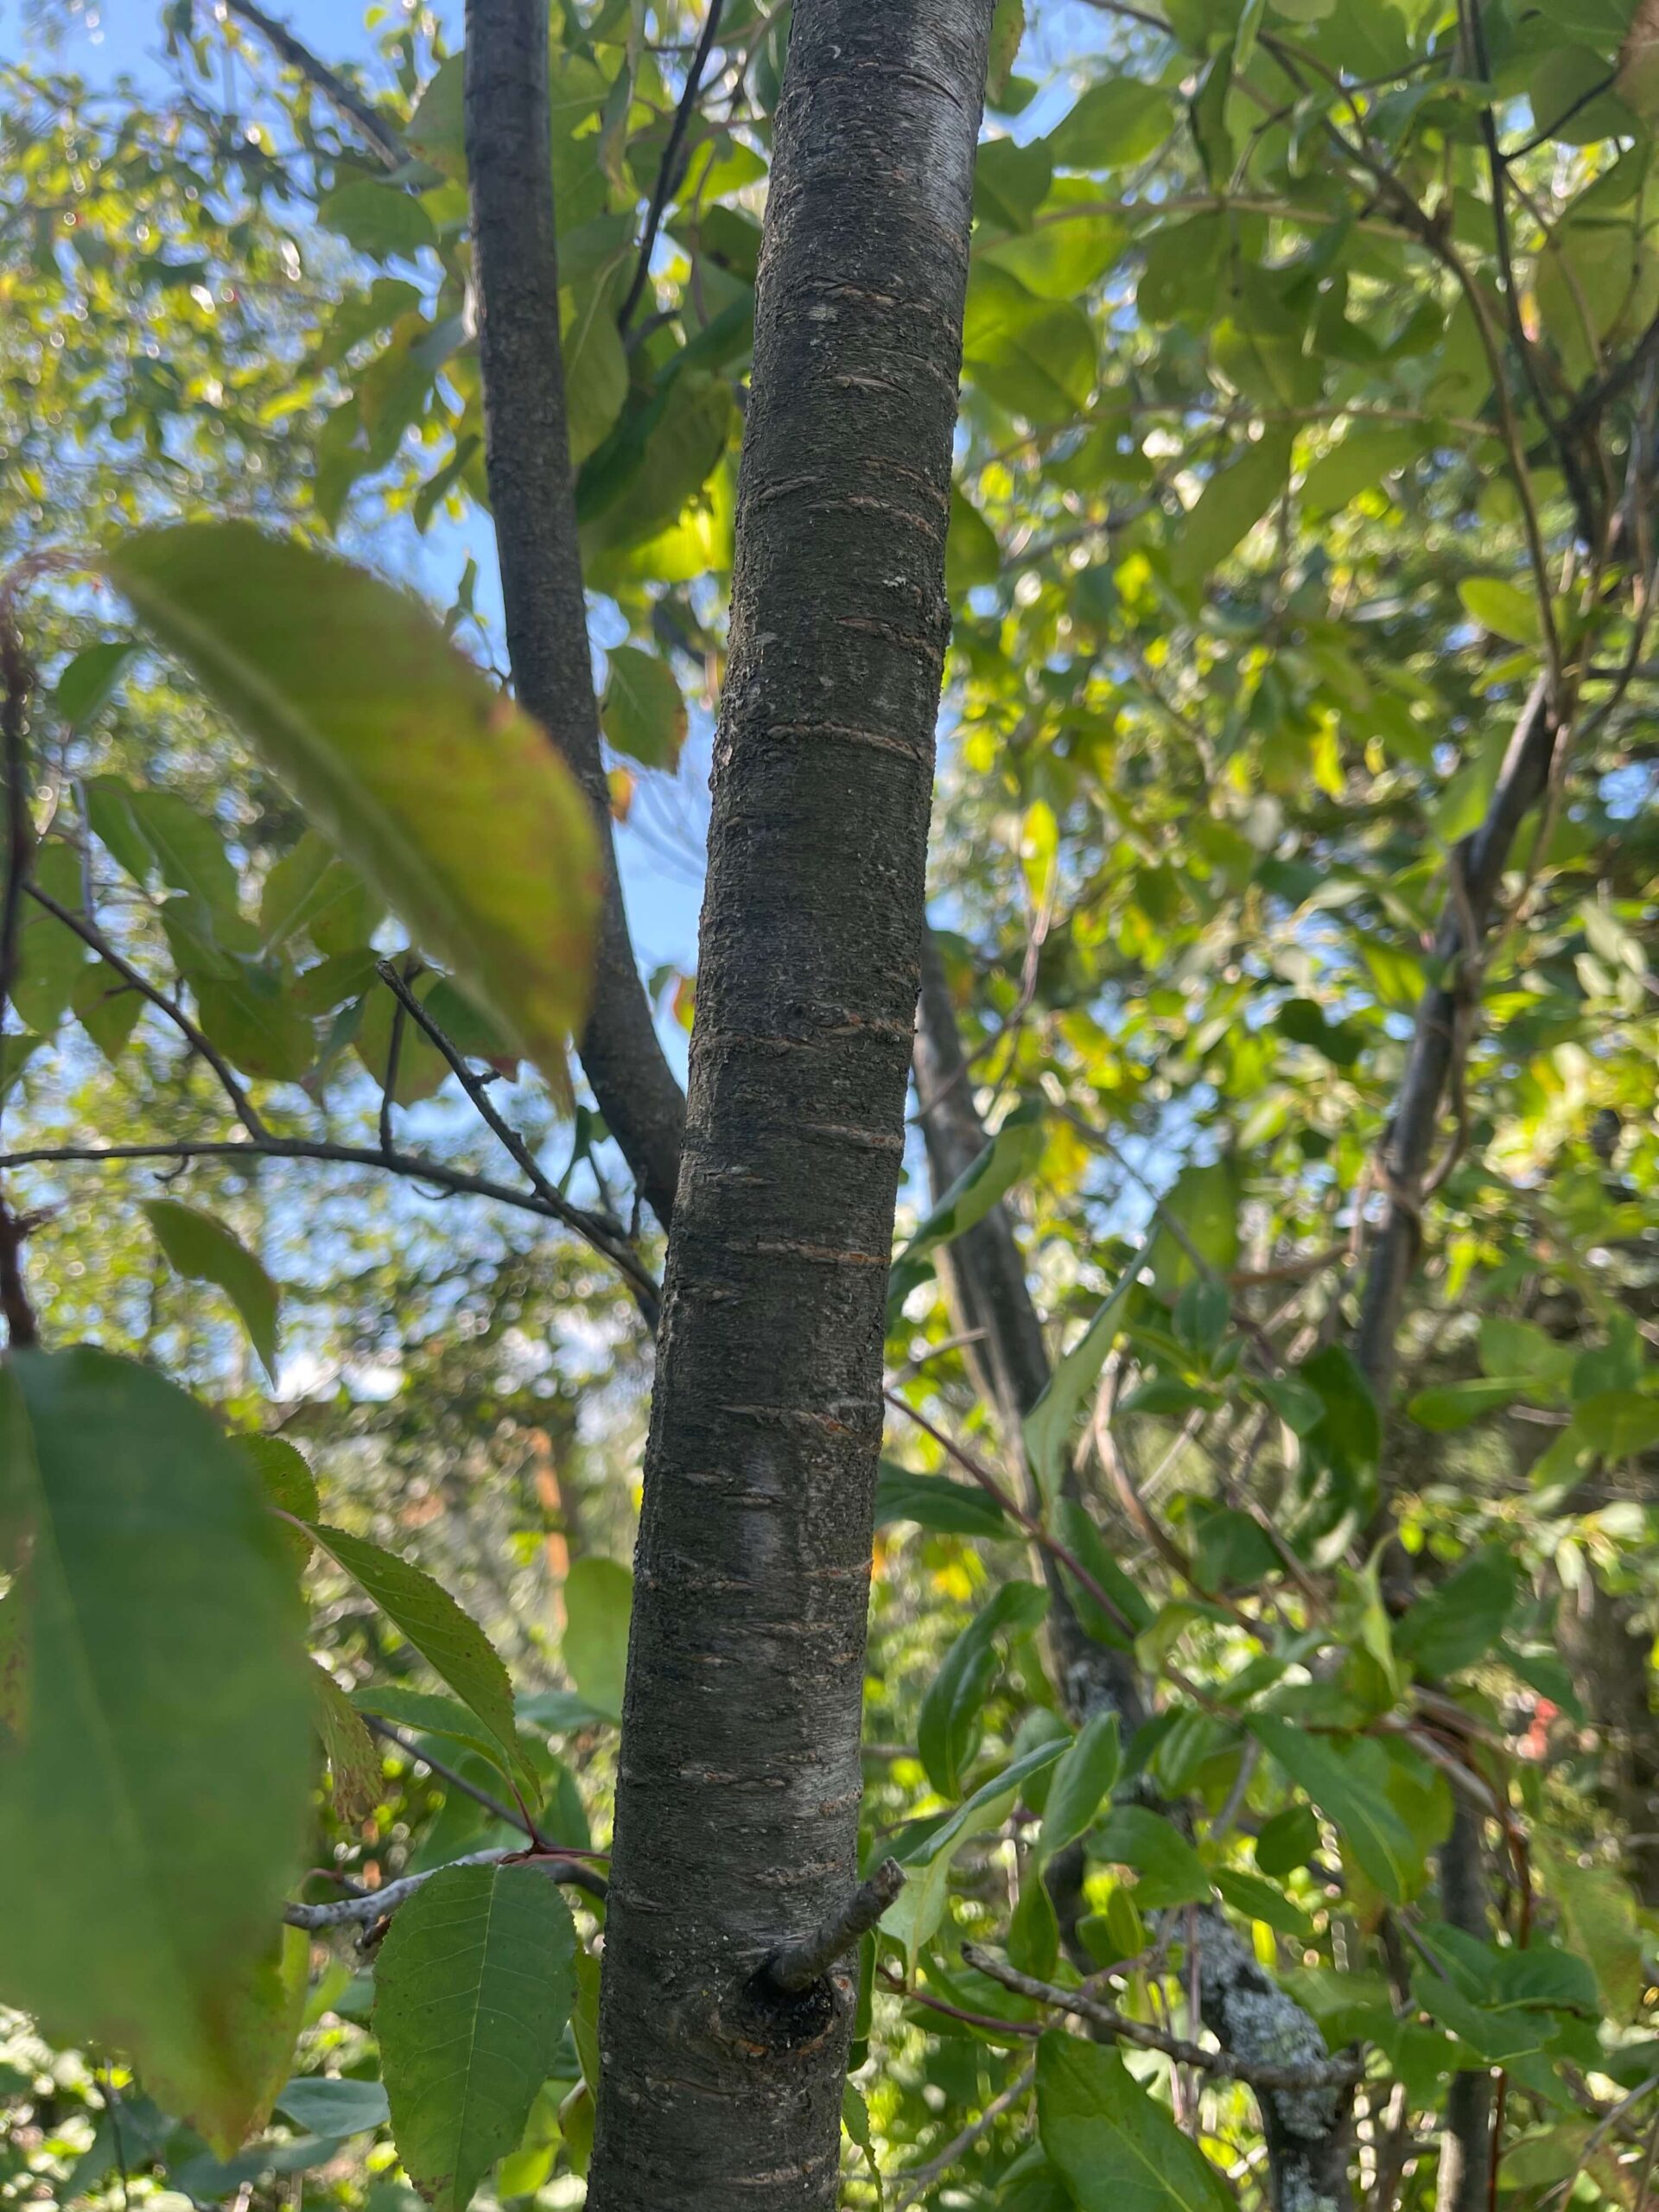
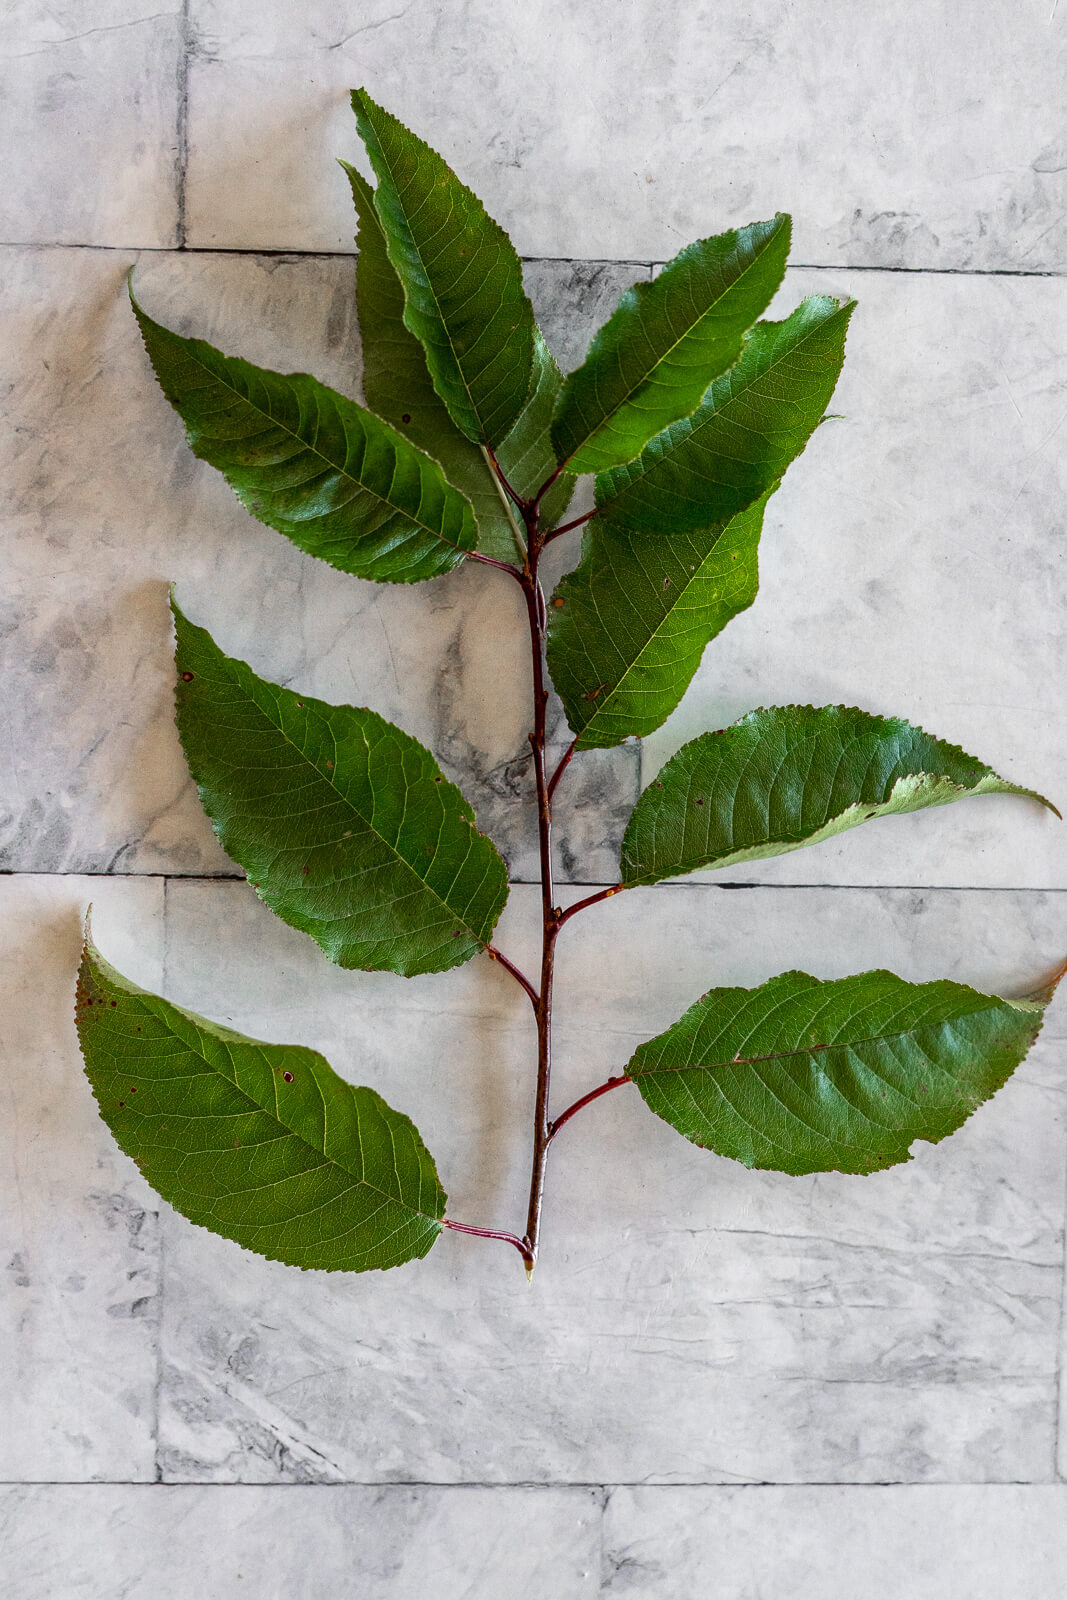
Pin cherry trees grow with a central leader and spread to a flat, rounded crown. Mature bark is reddish brown and smooth with small horizontal lines or lenticels with prominently raised pores. The young bark is bright, reddish brown. The leaves are alternate, simple, oval in shape, and have finely serrated margins.
The 5 petaled flowers arise in spring at the same time as the leaves. The white flowers are borne in clusters of 2 to 5 with each flower on an individual stem. The flowers give way to the small, red fruits which mature in late summer.

Harvesting Pin Cherries
The easiest way to harvest pin cherries is to watch the flowers in the spring. I love to start my foraging projects early. A few walks in the springtime help immensely when you're starting out foraging. It gives you a chance to notice the flowers and tree structures that you might not notice in the swing of things.
Once you notice the shiny rubies in the trees, grab a partner or a couple of kids and start picking! Ripe pin cherries come off the stems easily and once you find a good tree, you'll be able to pick them quickly.
I am built close to the ground, so sometimes a stool or ladder is beneficial. If the tree is juvenile and still bendy, you're able to pull the branches gently down closer to you for harvesting. If you choose to lower the branches, do so carefully, pull them but not too hard, too quickly, or too low.
Foraging and gathering always leave me feeling blessed and thankful to nature for providing abundance. One of the ways I return the favor is by being respectful during harvesting - I take enough for myself but leave enough for the plant and native animals to continue to grow and thrive.
Tips + Tricks
- Consider the source! Harvest pin cherries in a safe location. Consider wildlife as well as chemical contamination. Fire cherries found deep in the forest are more likely to increase encounters with wildlife, while harvesting near a busy roadway is more likely to increase chemical exposure from pollution and road maintenance.
- Do not eat the leaves, wood, bark, or seeds (pits)! These are TOXIC! Just like other plants in the Prunus species, they contain hydrocyanic acid and can/will cause cyanide poisoning.
- I've included directions for juicing pin cherries with a steam juicer as well as with a jelly bag. Both work but steaming juicing is just much simpler. If you're into picky fruits like pin cherries and choke cherries, I would invest in a steam juicer.
- This recipe requires 3 1/2 cups of pin cherry juice, steam juicing 6 cups of cherries yielded exactly 3 1/2 cups. If you don't have 3 1/2 cups, you can always top off with water.
How To Juice Pin Cherries
With A Steam Juicer:
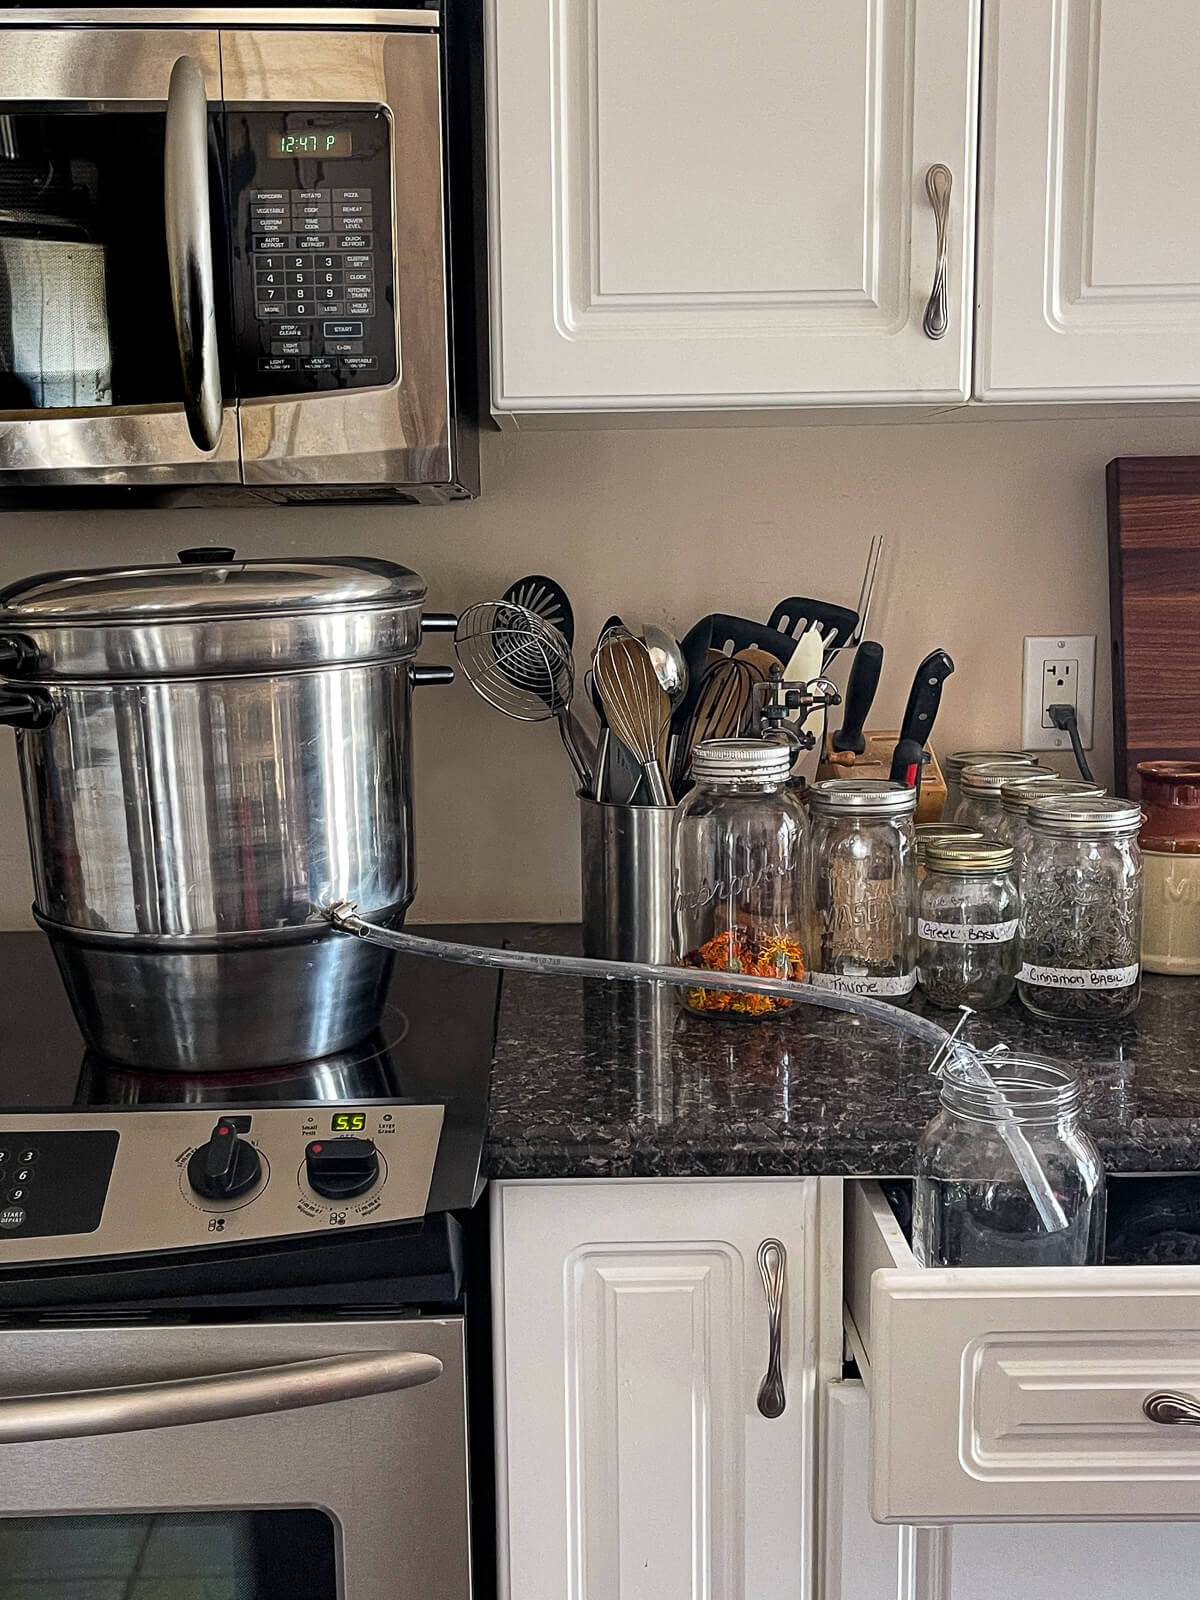
- Prepare the steam juicer for use by cleaning everything well in hot soapy water and rinsing well. Ensure the juice tube and clamp are securely fastened to the juice kettle.
- Fill the water pan of your steam juicer with the manufacturer's recommended amount of water - for mine, that's three-quarters full.
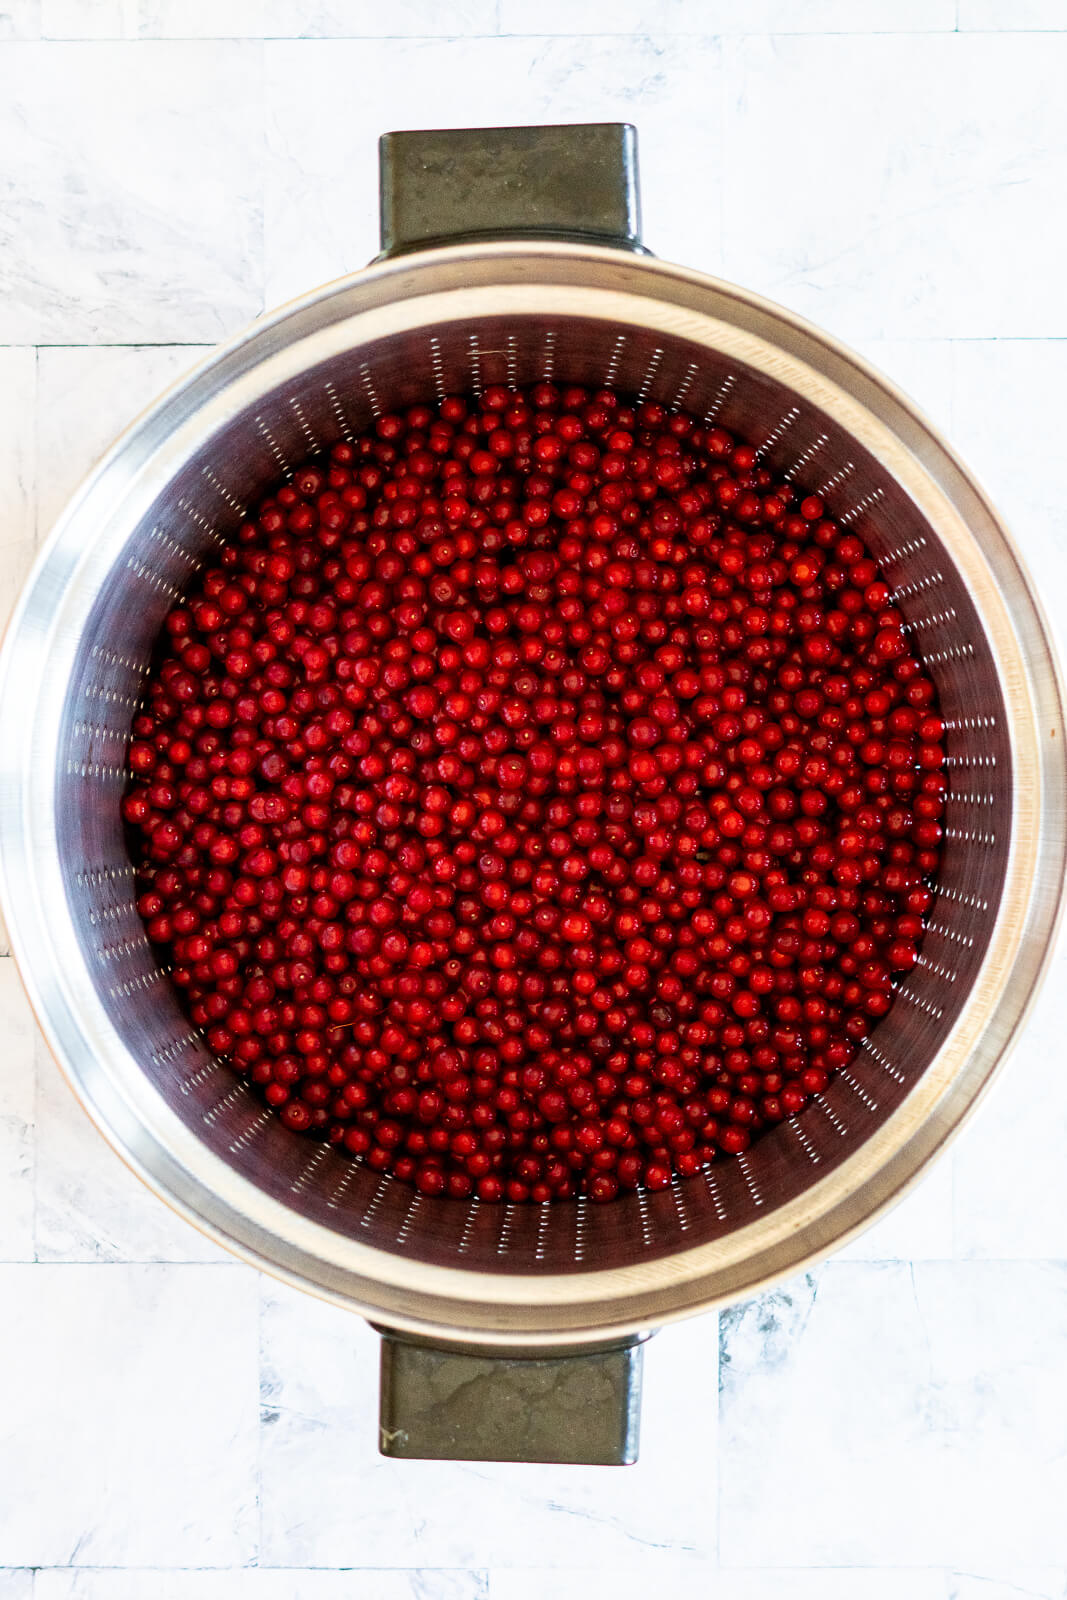
- Pick through berries and discard any that are bruised, split, or otherwise damaged. Stems can be left, but leaves must be removed.
- Wash berries under cool running water.
- Transfer 6 cups of prepared pin cherries to the vented food basket, place the food basket on top of the juice kettle, cover with the lid and place it on top of the water pan.
- Bring the steam juicer to a boil over medium-high heat, then reduce to medium heat. When steam begins to vent out the lid of the juicer, begin timing 60 minutes.
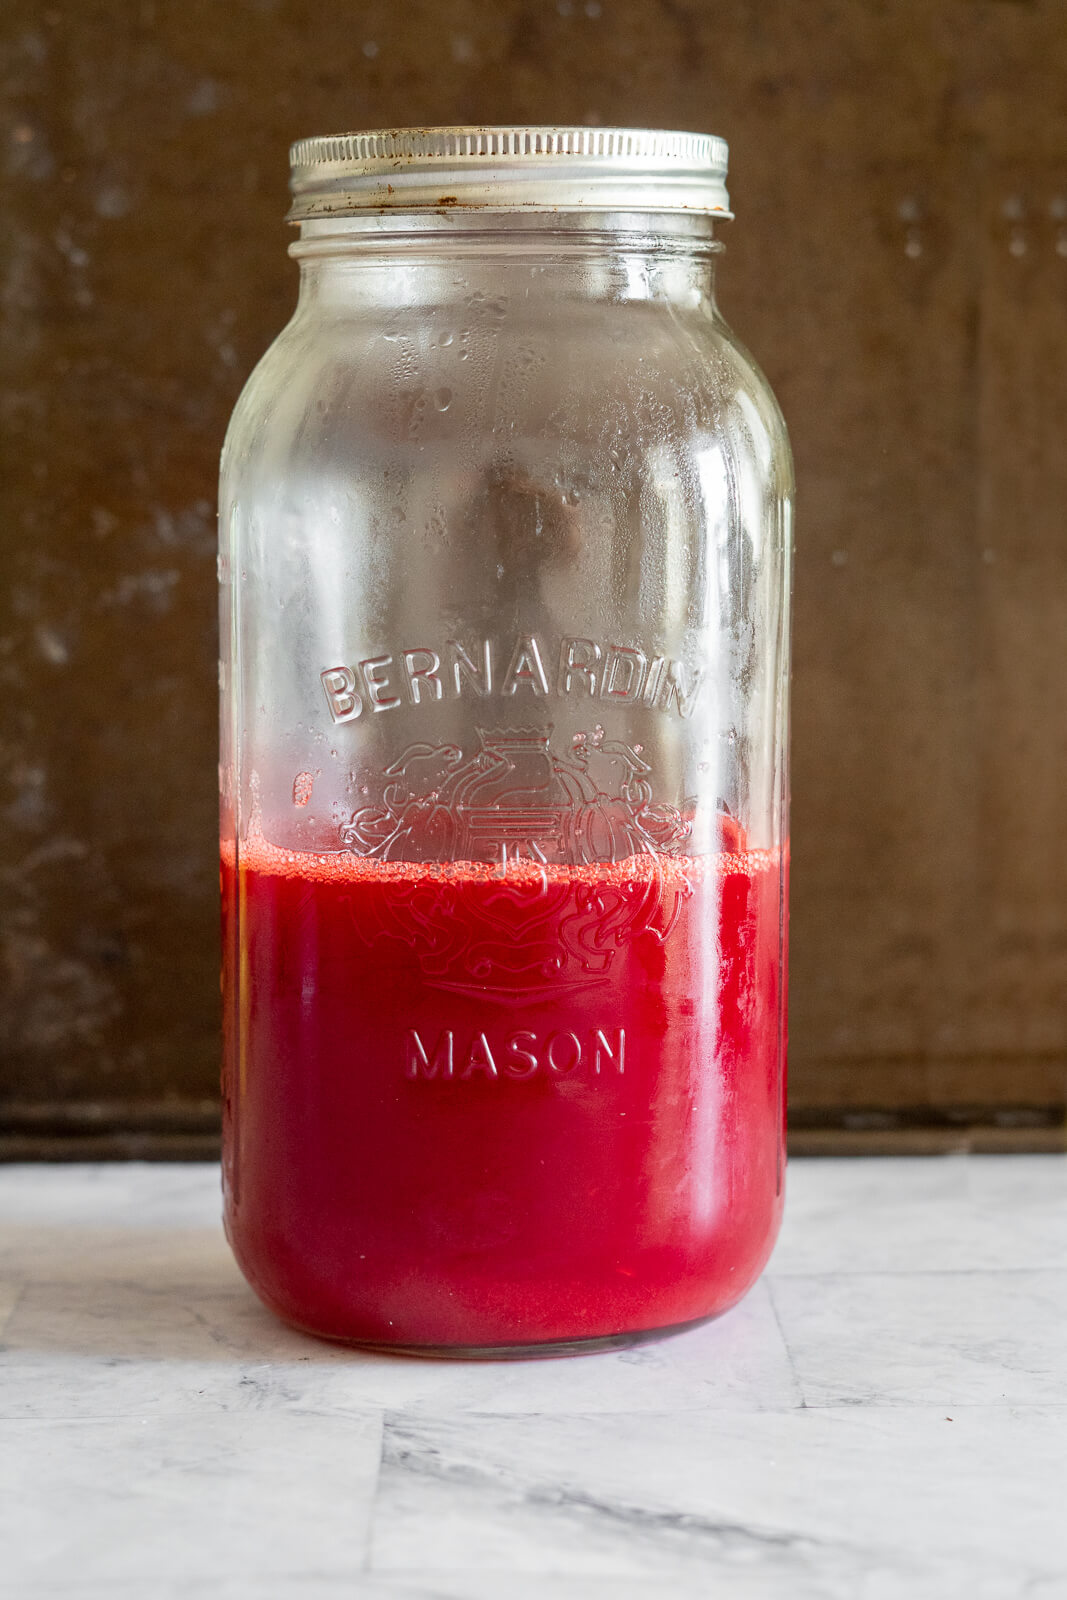
- During the juicing process, the juice will build up in the kettle, and once you notice the bright red juice in the juice tube, place the tube in a large, clean half-gallon mason jar and drain the juice. You'll have to do this a few times, or place the jar in a spot that's lower than the juicer and remove the hose clamp.
- The juice coming out of the juicer is extremely hot and can cause burns, I would be very cautious about placing the juice jar on a stool in front of the oven when there are other people in the house. I like to open a drawer next to my oven and place the jar right in the front. Then it's secure and I worry less about one of the kids or dog bumping it off a stool.
- Check the water pan regularly during this time, it is imperative to ensure you have sufficient water in the water pan.
- Once the timer is complete, allow the juicer to cool before carefully tilting the juice kettle towards the spigot to drain the remaining juice into the collection jar.
- Cover the juice and cool until room temperature before placing it in the fridge or freezer for storage. See canning directions below for long-term storage.
- The cooked pin cherry pulp contains the pits and hydrocyanic acid within them and should not be eaten, it can be added to your compost!
By Simmering + Straining:
- Pick through berries and discard any that are bruised, split, or otherwise damaged. Stems can be left, but leaves must be removed.
- Wash berries under cool running water.
- In a large, heavy-bottomed saucepan, combine 6 cups of pin cherries with 6 cups of water.
- Bring cherries and water to a boil over medium heat, once the mixture reaches a boil, reduce the temperature to medium-low and simmer for 25-30 minutes, stir well to mash the fruit.
- Rest the cooked cherries for 10-15 minutes, uncovered.
- Meanwhile, prepare a jelly bag, fine mesh strainer, or colander/ chinois by lining with two dampened layers of cheesecloth. Set your strainer over a large bowl to collect the juice.
- Pour the cooked fruit into the strainer and allow the fruit to drain undisturbed for at least 2 hours.
- Avoid squeezing the fruit! This will cause a cloudy juice as it will force pulp through the strainer.
- Transfer juice to a clean, air-tight container before storing it in the fridge or freezer, or see the canning directions below for long-term storage.
- The cooked pin cherry pulp contains the pits and hydrocyanic acid within them and should not be eaten, it can be added to your compost!
How To Make Pin Cherry Jelly
Prepare Canning Supplies
- Wash and sterilize all jars, lids, screw bands, funnels, and ladles for canning.
- Prepare a small hot water bath canner by adding a canning rack and filling it with water.
- Cover the canner and set over medium-high heat to come to a boil while making jelly.
Make Pin Cherry Jelly
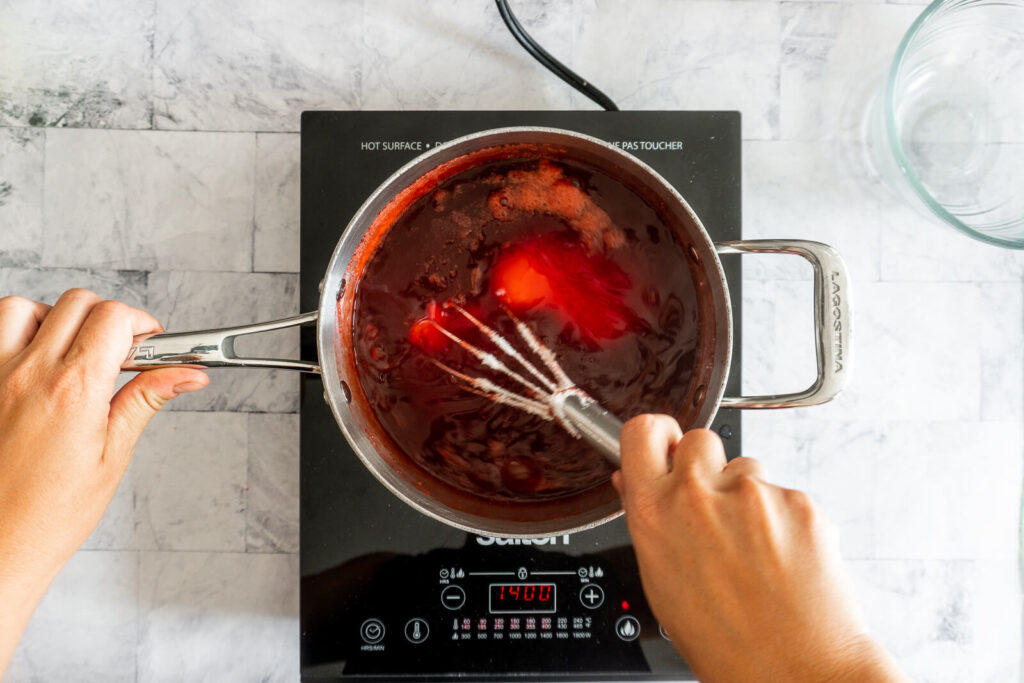
- Measure pin cherry juice, and top up the with water to make exactly 3 1/2 cups. Then add to a large heavy-bottomed saucepan, set over medium heat - this is a small batch but jelly likes to bubble up, so ensure you have enough room in your clean pot.
- Add 2 tablespoons of lemon juice, 1 tablespoon of butter - this is optional, it helps to reduce foaming, and 1 57g package of dry pectin.
- Whisk all ingredients to combine and bring to a boil over medium heat.
- Once the juice mixture has reached a boil, add in 4 cups of sugar and whisk or stir to combine. Return this mixture to a full boil that cannot be stirred down and boil for 1 minute.


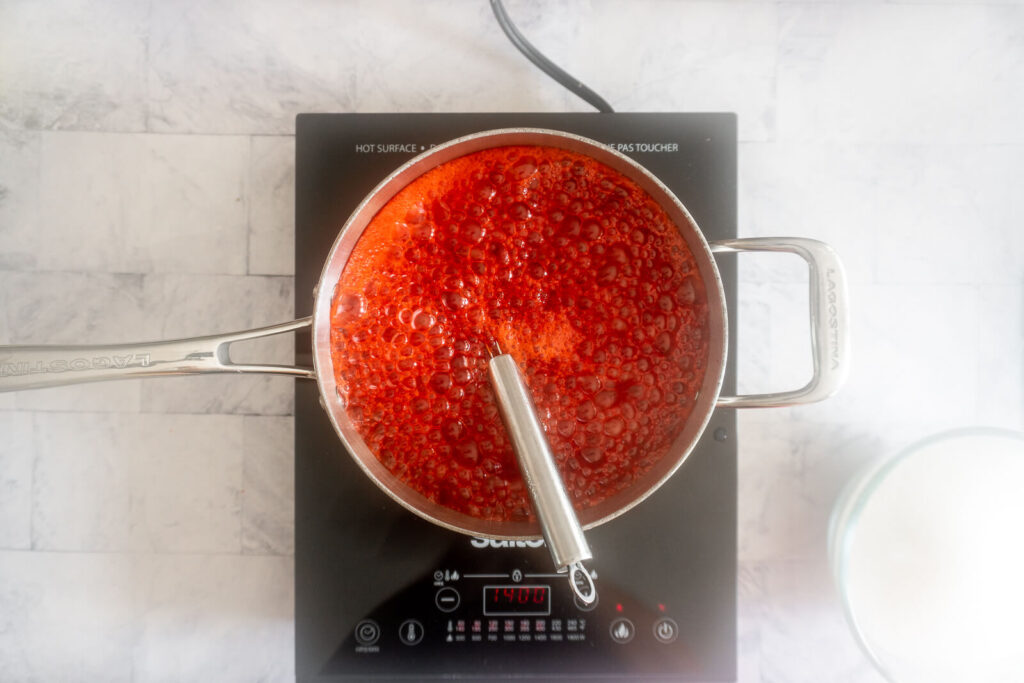

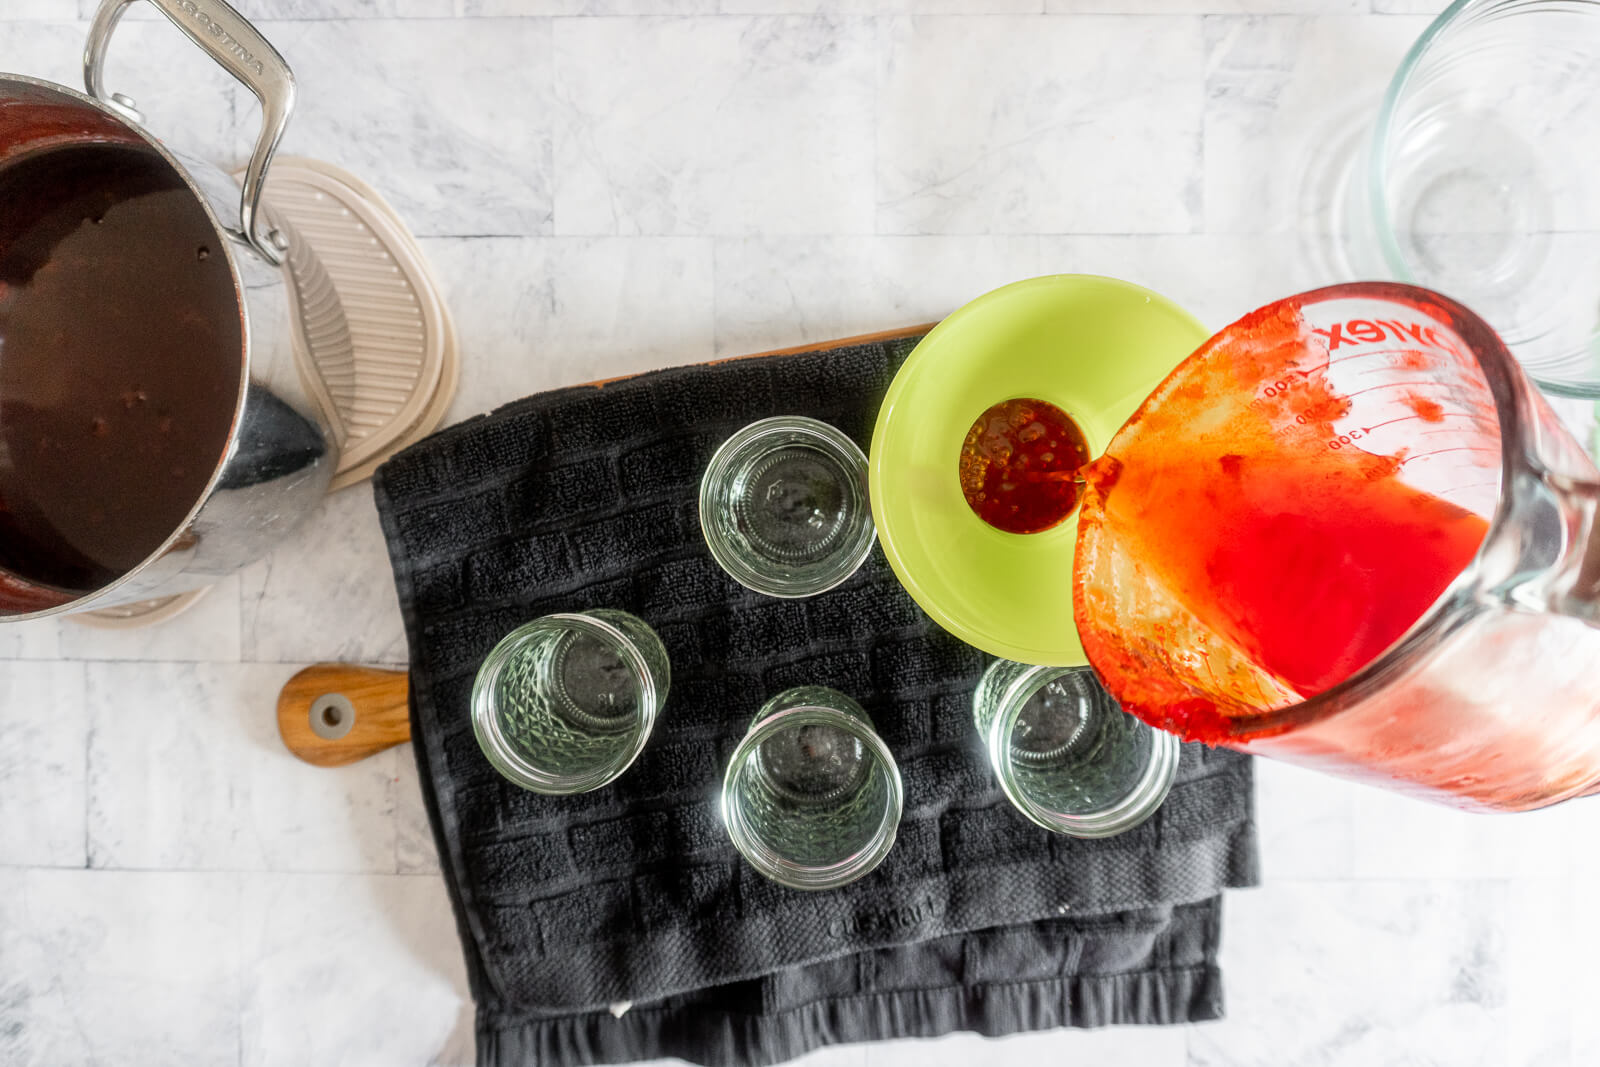
- Remove from heat and skim off any foam.
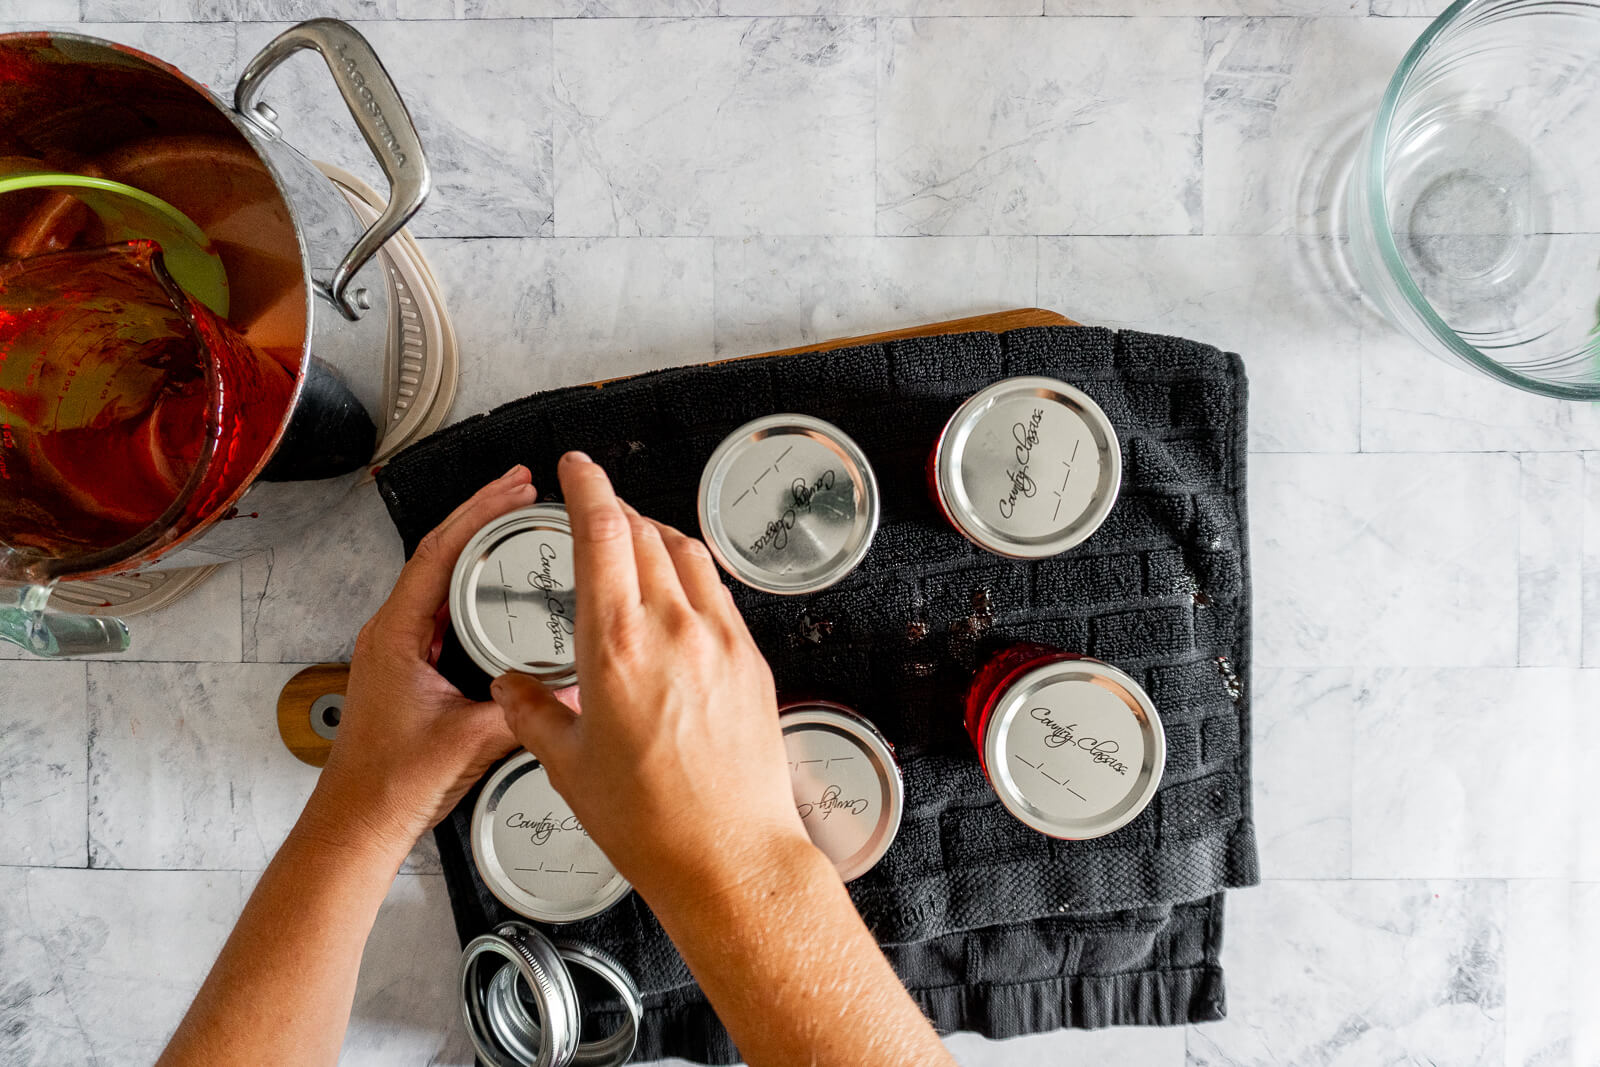
- Carefully transfer hot jelly to prepared jars using a jar funnel and ladle or measuring cup. Fill each jar, leaving 1/4 inch headspace. Wipe the rims of the jars with a clean paper towel, cover with a snap lid and tighten the screw bands finger tight.
- Using a jar lifter, transfer prepared jelly jars to the prepared hot water bath, ensuring the jars are covered by at least 1 inch of water.
- Process the jars for 10 minutes at 0-1000 feet, 15 minutes at 1001-3000 feet, and 20 minutes at 3001-6000 feet.
- When the processing time is complete, turn off the burner, remove the canner lid and allow to rest for 5 minutes then remove the jars from the water bath, and transfer to a heat-safe surface.
- Allow the jars to cool at room temperature for 24 hours undisturbed. I place my jars on an old wooden or plastic cutting board to protect them from the cold countertop. I love to hang out in the kitchen for a few minutes after removing my jars from the canner because there is no sweeter sound than the ping of a properly sealed jar!
- The next day, check jar seals to ensure processing was successful. Properly sealed lids will curve downward. Remove rings, wipe, and label all jelly jars before storing.

Batch + Storage
Batch:
This recipe makes a small batch of pin cherry jelly, yielding 6 half-pint jars. If you'd like more, make your recipes separately rather than concurrently as doubling recipes with pectin can cause them to gel inconsistently.
Storage:
Store your wonderful jelly in a cool dry place away from direct sunlight. For best results, enjoy the pin cherry jelly within 12 months.
Jelly Didn't Set?
This happens from time to time when making jams and jellies. Don't fret, all your work isn't for naught! Here are some easy solutions:
- You can leave the "runny" jelly and treat it like a delicious fireweed syrup.
- Place a jar in the fridge for 24 hours - if the jelly sets firm, remove it from the fridge and allow it to rest on the counter at room temperature - if it stays firm, treat the remaining jars the same, if not, you can always refrigerate the jars as needed.
- Recook and reprocess the jelly with sugar-free pectin: use all 4 cups of jelly, 1/4 cup of water, 1/4 cup of sugar, 2 tablespoons of lemon juice, and 4 teaspoons of powdered pectin. Bring to a hard boil for 1 minute, then re-jar and reprocess.
Pin Cherry Jelly

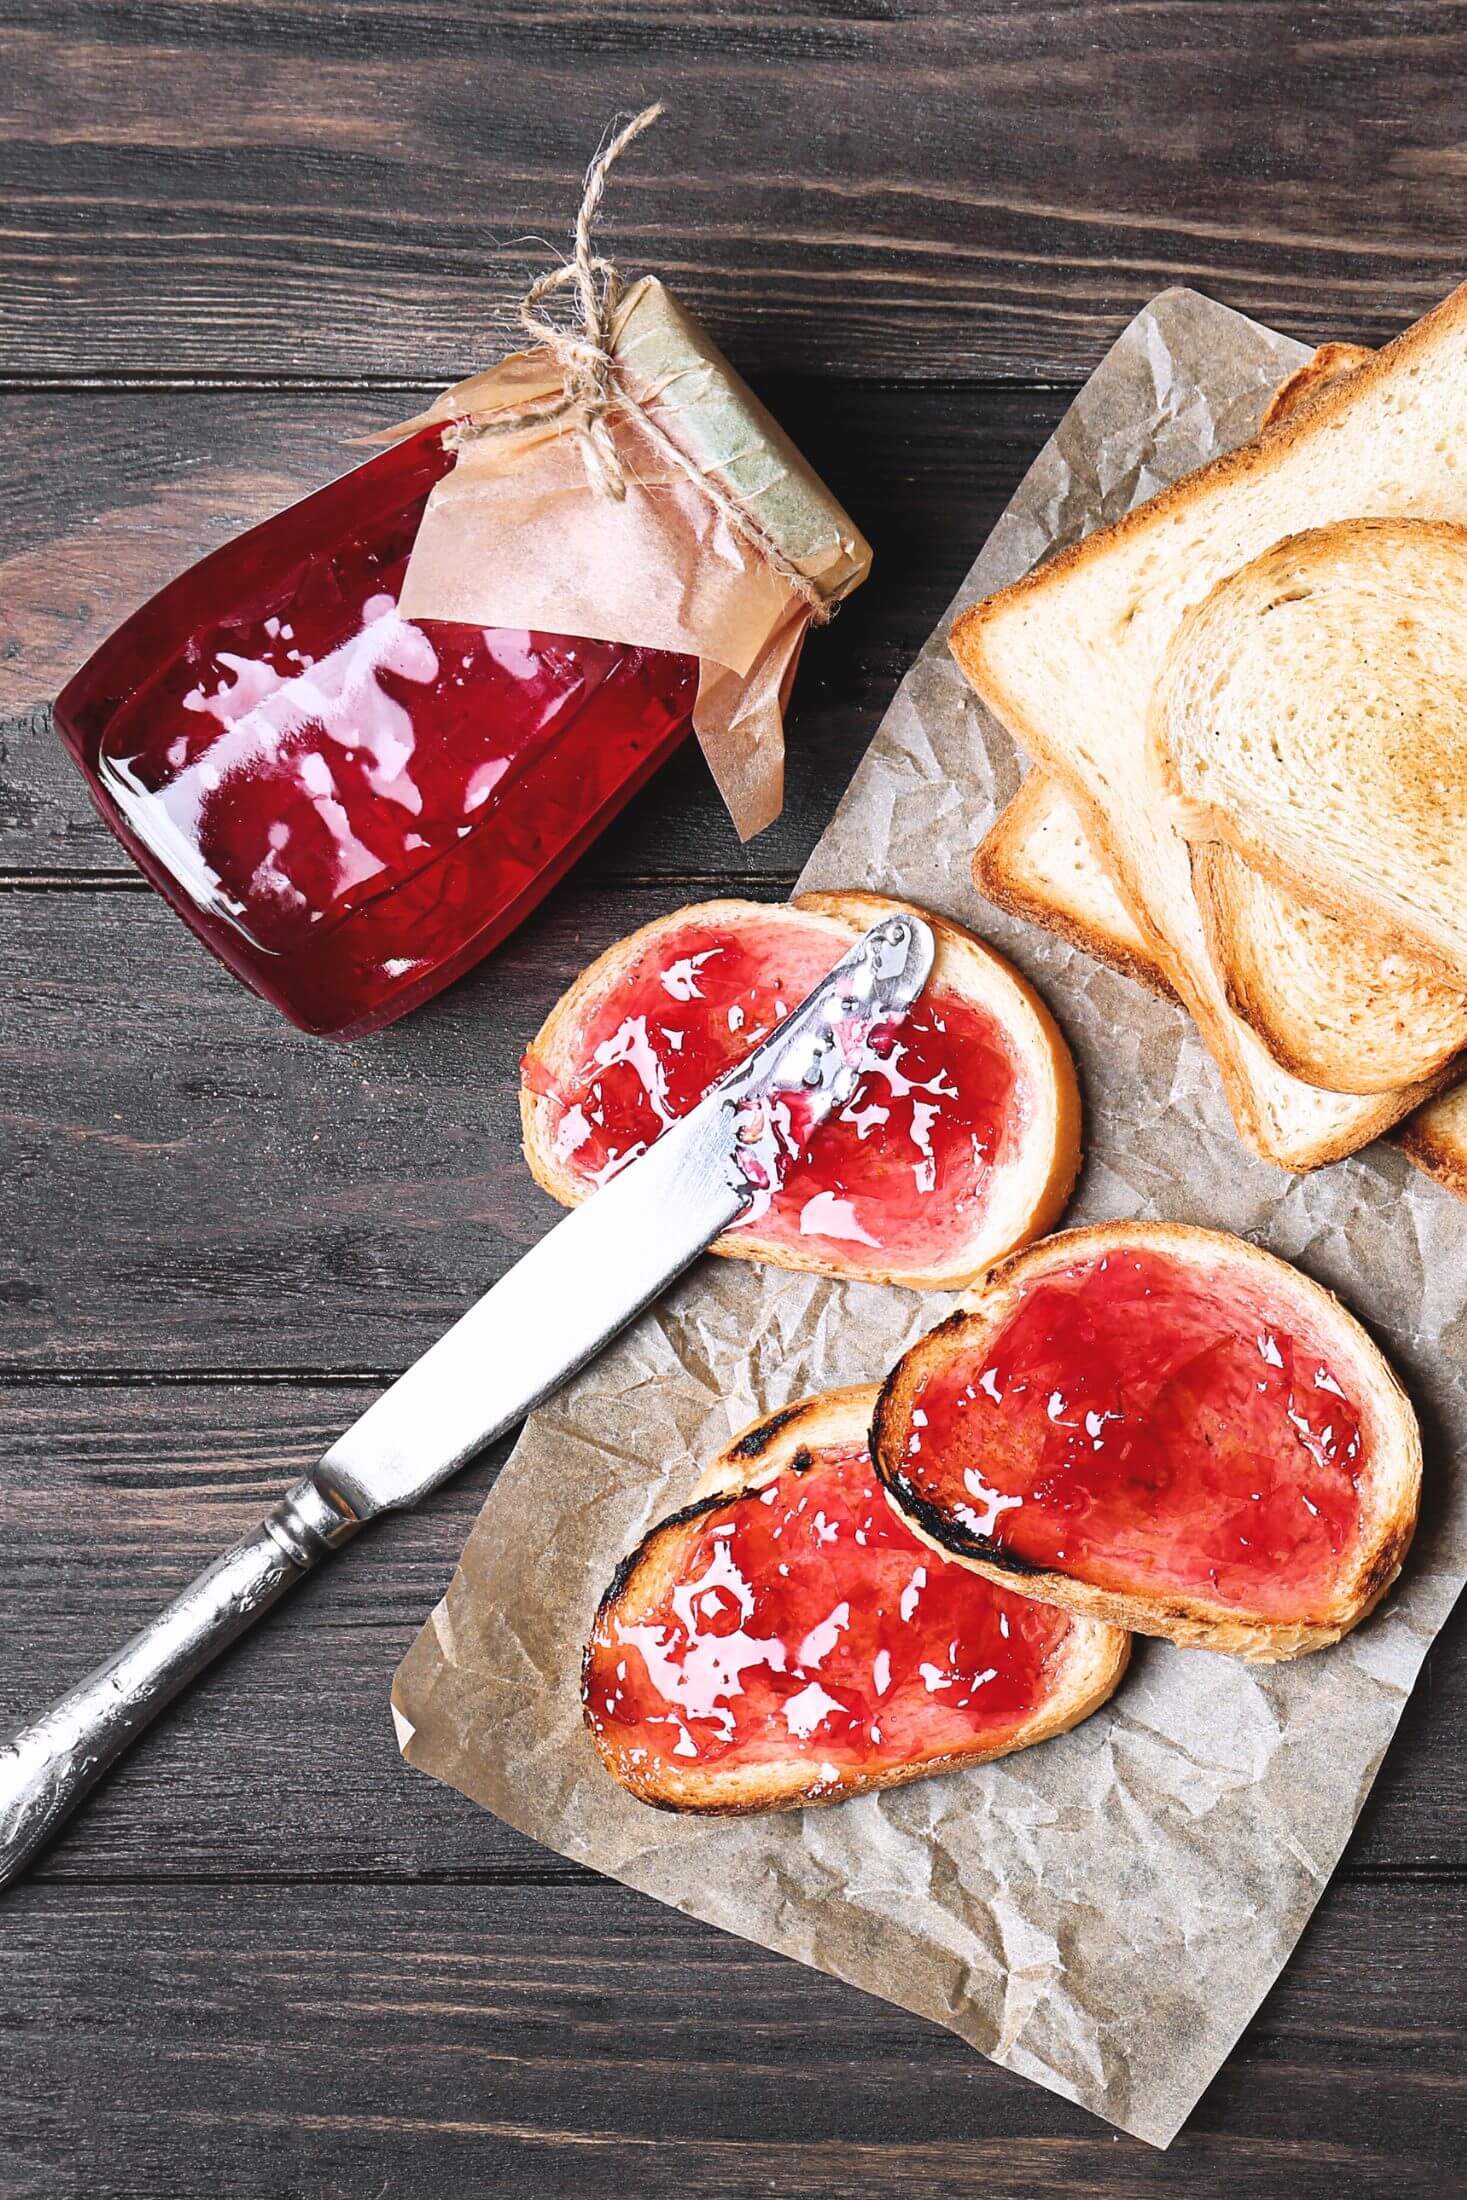
This foraged pin cherry jelly recipe is a delightful way to enjoy the flavors of summer in a jar. Made with tart pin cherries picked fresh from the tree, this jelly is bursting with bright and tangy flavor. Preserve the taste of summer for months to come.
Ingredients
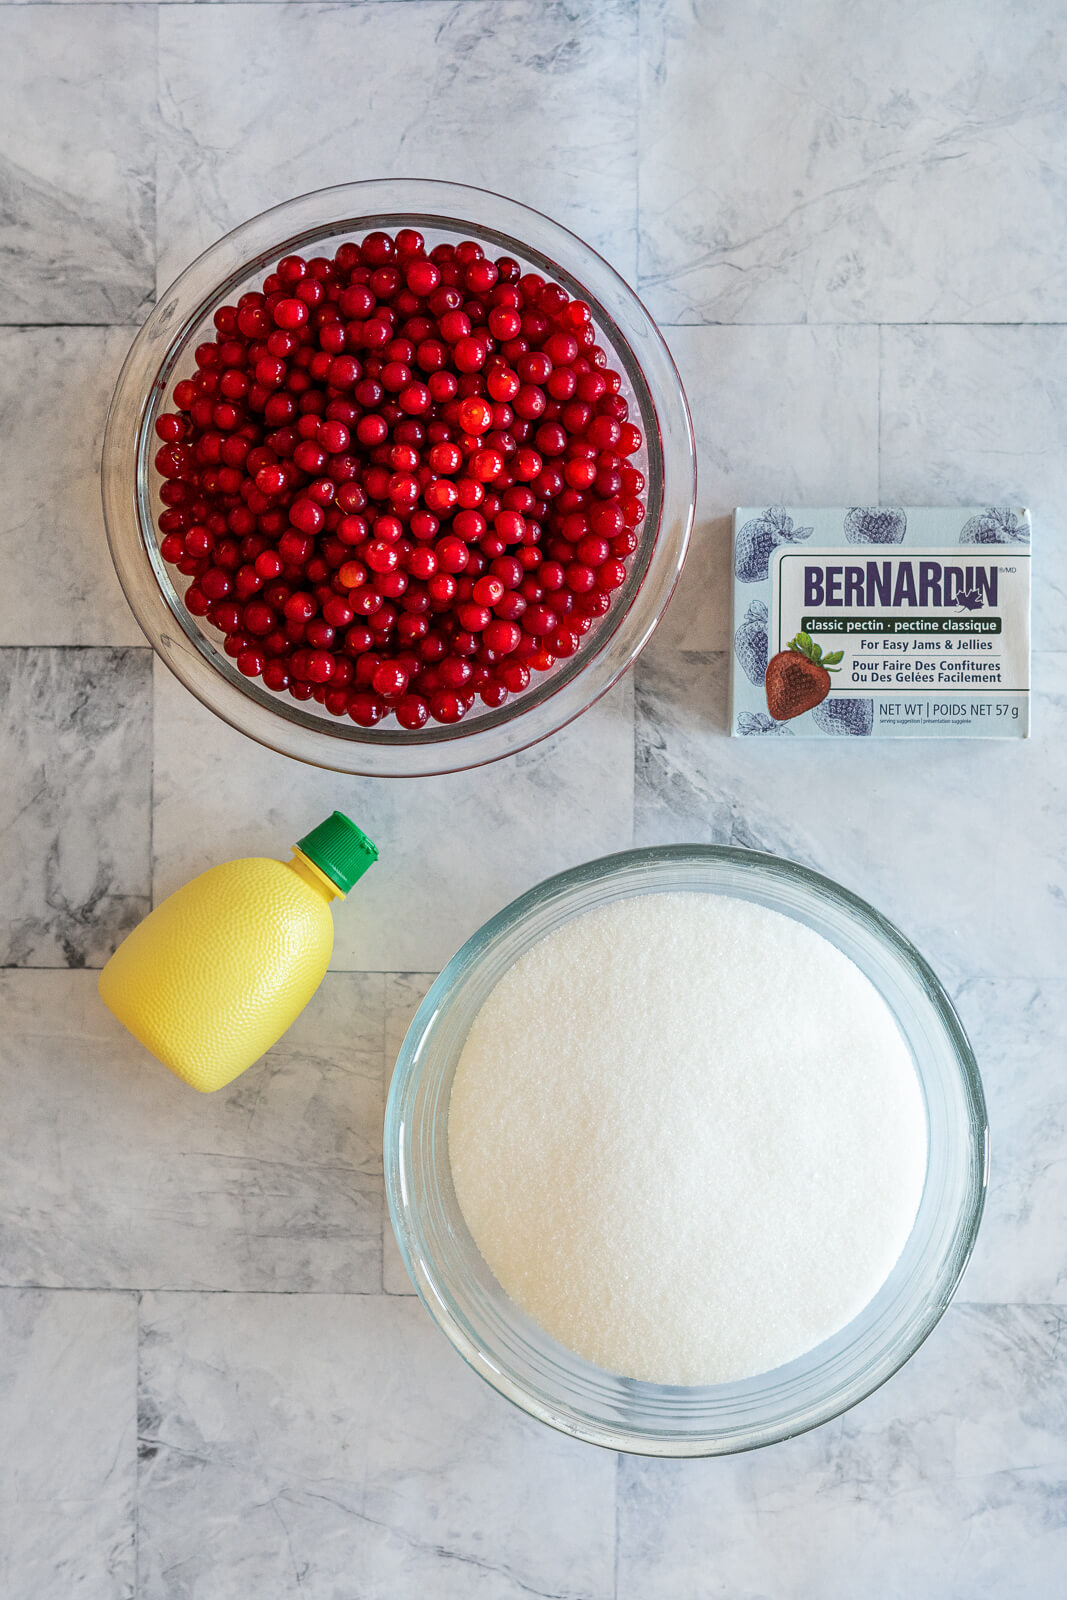
- 6 cups pin cherries, fresh or frozen
- 6 cups water
- 1 package pectin (57 g)
- 2 tablespoons lemon juice
- 1 tablespoon butter
- 4 cups water
Instructions
Juice The Pin Cherries:
With A Steam Juicer:
- Prepare the steam juicer for use by cleaning everything well in hot soapy water and rinsing well. Ensure the juice tube and clamp are securely fastened to the juice kettle.
- Fill the water pan of your steam juicer with the manufacturer's recommended amount of water - for mine, that's three-quarters full.
- Pick through cherries and discard any that are bruised, split, or otherwise damaged. Stems can be left, but leaves must be removed.
- Wash pin cherries under cool running water.
- Transfer 6 cups of prepared pin cherries to the vented food basket, place the food basket on top of the juice kettle, cover with the lid and place it on top of the water pan.
- Bring the steam juicer to a boil over medium-high heat, then reduce to medium heat. When steam begins to vent out the lid of the juicer, begin timing 60 minutes.
- During the juicing process, the juice will build up in the kettle, and once you notice the bright red juice in the juice tube, place the tube in a large, clean half-gallon mason jar and drain the juice. You'll have to do this a few times, or place the jar in a spot that's lower than the juicer and remove the hose clamp. The juice coming out of the juicer is extremely hot and can cause burns, so ensure caution is used.
- Check the water pan regularly during this time, it is imperative to ensure you have sufficient water in the water pan.
- Once the timer is complete, allow the juicer to cool before carefully tilting the juice kettle towards the spigot to drain the remaining juice into the collection jar.
- Cover the juice and cool until room temperature before placing it in the fridge or freezer for storage. See canning directions below for long-term storage.
- The cooked pin cherry pulp contains the pits and hydrocyanic acid within them and should not be eaten, it can be added to your compost!
By Simmering + Straining:
- Pick through berries and discard any that are bruised, split, or otherwise damaged. Stems can be left, but leaves must be removed.
- Wash berries under cool running water.
- In a large, heavy-bottomed saucepan, combine 6 cups of pin cherries with 6 cups of water.
- Bring cherries and water to a boil over medium heat, once the mixture reaches a boil, reduce the temperature to medium-low and simmer for 25-30 minutes, stir well to mash the fruit.
- Rest the cooked cherries for 10-15 minutes, uncovered.
- Meanwhile, prepare a jelly bag, fine mesh strainer, or colander/ chinois by lining with two dampened layers of cheesecloth. Set your strainer over a large bowl to collect the juice.
- Pour the cooked fruit into the strainer and allow the fruit to drain undisturbed for at least 2 hours.
- Avoid squeezing the fruit! This will cause a cloudy juice as it will force pulp through the strainer.
- Transfer juice to a clean, air-tight container before storing it in the fridge or freezer, or see the canning directions below for long-term storage.
Prepare Canning Supplies
- Wash and sterilize all jars, lids, screw bands, funnels, and ladles for canning.
- Prepare a small hot water bath canner by adding a canning rack and filling it with water.
- Cover the canner and set over medium-high heat to come to a boil while making jelly.
Make Pin Cherry Jelly
- Measure pin cherry juice, and top up the with water to make exactly 3 1/2 cups. Then add to a large heavy-bottomed saucepan, set over medium heat - this is a small batch but jelly likes to bubble up, so ensure you have enough room in your clean pot.
- Add 2 tablespoons of lemon juice, 1 tablespoon of butter - this is optional, it helps to reduce foaming, and 1 57g package of dry pectin.
- Whisk all ingredients to combine and bring to a boil over medium heat.
- Once the juice mixture has reached a boil, add in 4 cups of sugar and whisk or stir to combine. Return this mixture to a full boil that cannot be stirred down and boil for 1 minute.
- Remove from heat and skim off any foam.
- Carefully transfer hot jelly to prepared jars using a jar funnel and ladle or measuring cup. Fill each jar, leaving 1/4 inch headspace. Wipe the rims of the jars with a clean paper towel, cover with a snap lid and tighten the screw bands finger tight.
- Using a jar lifter, transfer prepared jelly jars to the prepared hot water bath, ensuring the jars are covered by at least 1 inch of water.
- Process the jars for 10 minutes at 0-1000 feet, 15 minutes at 1001-3000 feet, and 20 minutes at 3001-6000 feet.
- When the processing time is complete, turn off the burner, remove the canner lid and allow to rest for 5 minutes then remove the jars from the water bath, and transfer to a heat-safe surface.
- Allow the jars to cool at room temperature for 24 hours undisturbed. I place my jars on an old wooden or plastic cutting board to protect them from the cold countertop. I love to hang out in the kitchen for a few minutes after removing my jars from the canner because there is no sweeter sound than the ping of a properly sealed jar!
- The next day, check jar seals to ensure processing was successful. Properly sealed lids will curve downward. Remove rings, wipe, and label all jelly jars before storing.
Notes
Batch:
This recipe makes a small batch of pin cherry jelly, yielding 6 half-pint jars. If you'd like more, make your recipes separately rather than concurrently as doubling recipes with pectin can cause them to gel inconsistently.
Storage:
Store your wonderful jelly in a cool dry place away from direct sunlight. For best results, enjoy the pin cherry jelly within 12 months.
Jelly Didn't Set?
This happens from time to time when making jams and jellies. Don't fret, all your work isn't for naught! Here are some easy solutions:
- You can leave the "runny" jelly and treat it like a delicious fireweed syrup.
- Place a jar in the fridge for 24 hours - if the jelly sets firm, remove it from the fridge and allow it to rest on the counter at room temperature - if it stays firm, treat the remaining jars the same, if not, you can always refrigerate the jars as needed.
- Recook and reprocess the jelly with sugar-free pectin: use all 4 cups of jelly, 1/4 cup of water, 1/4 cup of sugar, 2 tablespoons of lemon juice, and 4 teaspoons of powdered pectin. Bring to a hard boil for 1 minute, then re-jar and reprocess.
Recommended Products
As an Amazon Associate and member of other affiliate programs, I earn from qualifying purchases.


Nutrition Information:
Yield:
50Serving Size:
1Amount Per Serving: Calories: 16Total Fat: 0gSaturated Fat: 0gTrans Fat: 0gUnsaturated Fat: 0gCholesterol: 1mgSodium: 6mgCarbohydrates: 4gFiber: 0gSugar: 2gProtein: 0g
Pin This Wild Pin Cherry Jelly Recipe!
why does it have to be no-sugar pectin for redoing the jelly that didn't set?
Using no pectin sugar allows you to reprocess without adding all the sugar required by regular pectin. Using sugar free pectin allows you to process using only a small amount of added sugar versus 4 cups!